

Use Updates to share news with your visitors, like new opening hours, a new product or an upcoming sale. You write each update in your dashboard, then show your updates on any page with the Updates block.
Step 1: Open Updates
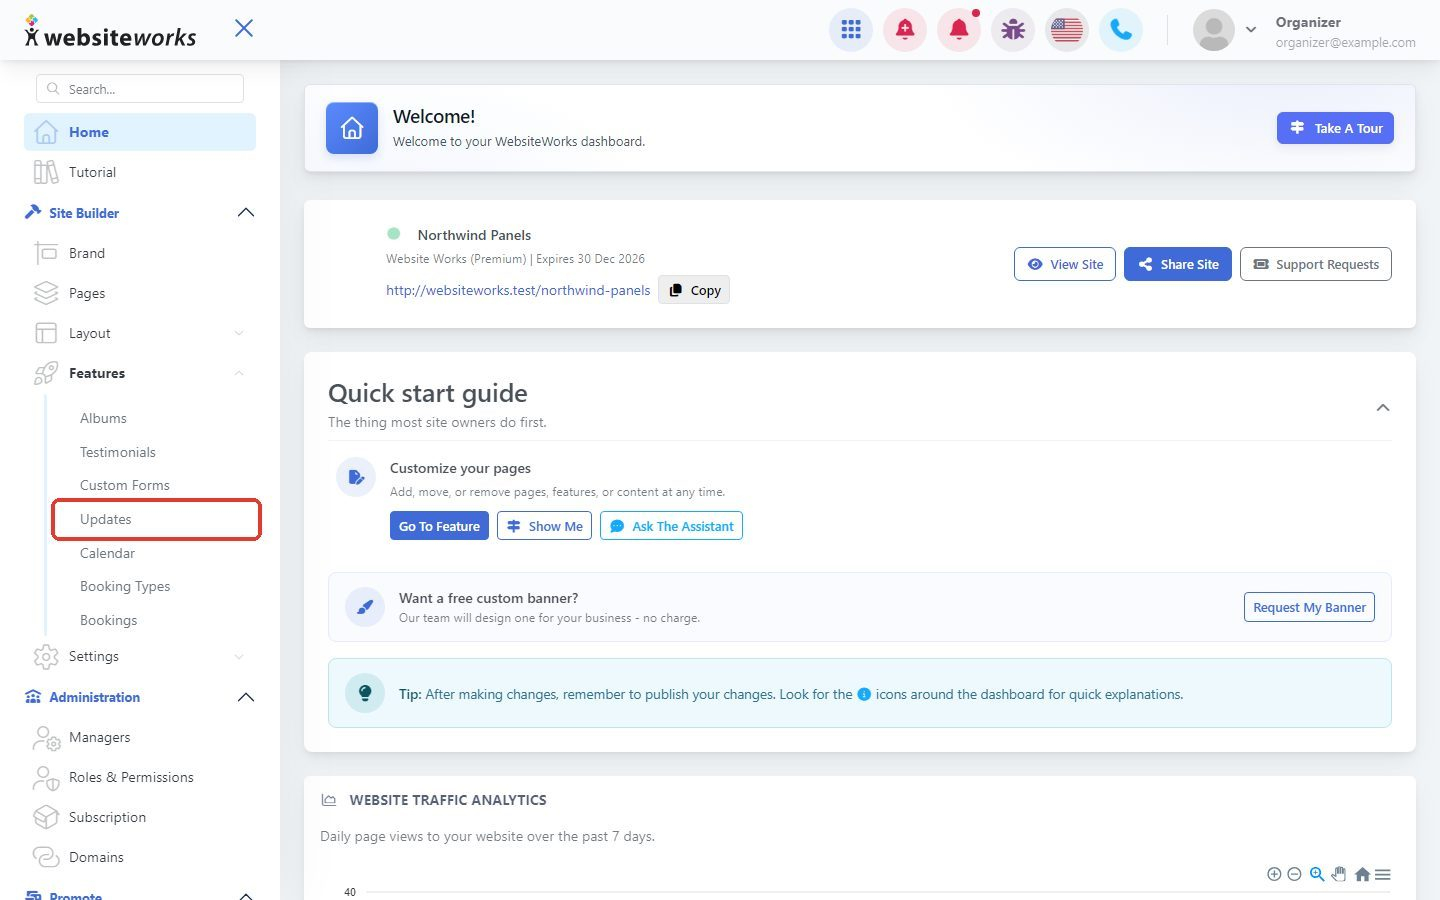
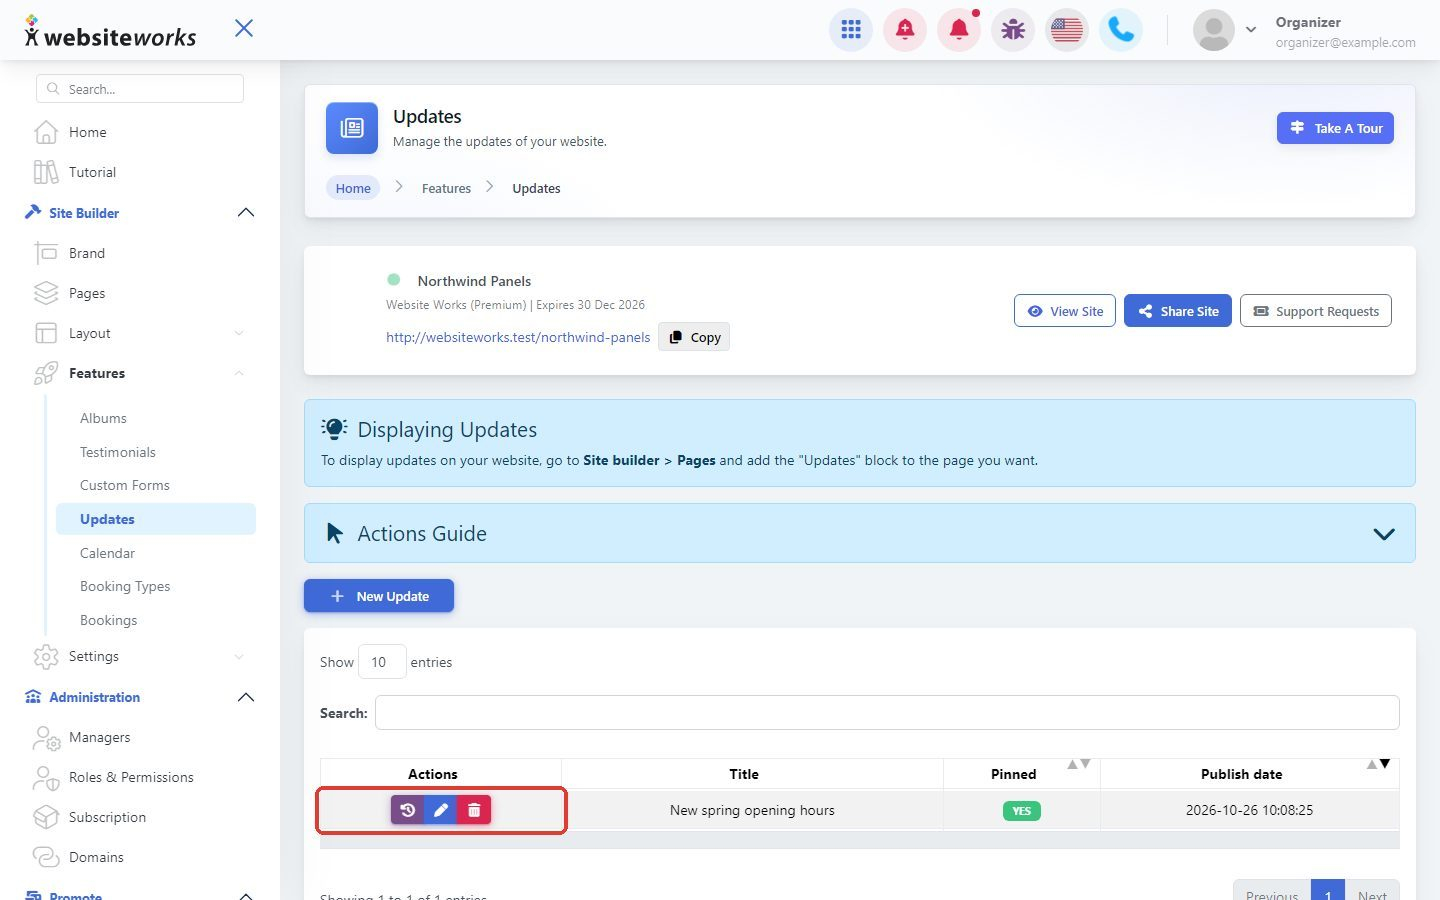
In the menu, click Features, then Updates.
Step 2: Create a new update
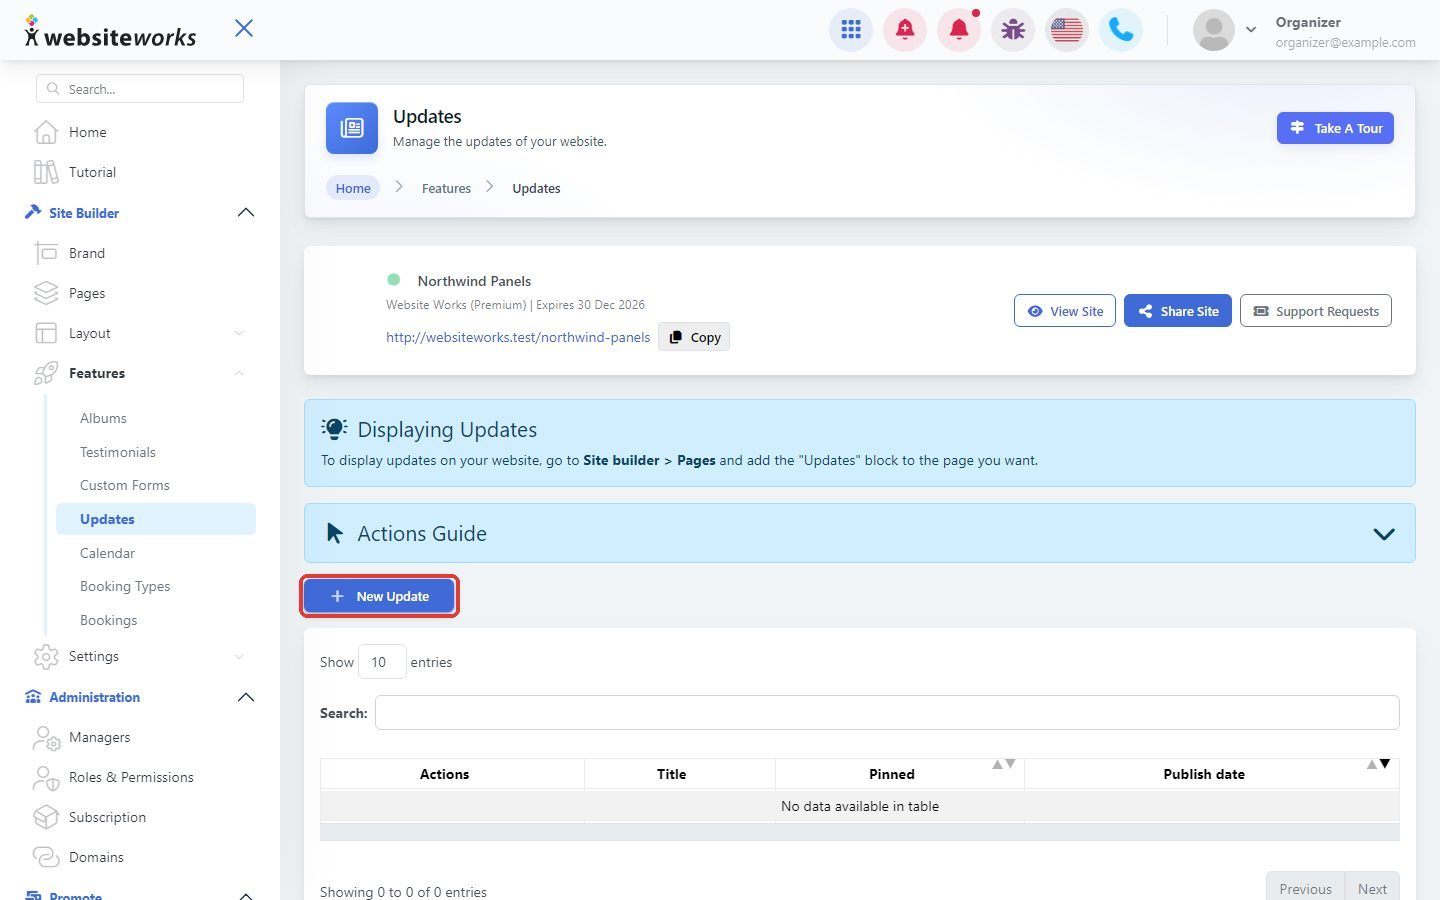
Click New Update.
Step 3: Write your update
In the Create update window:
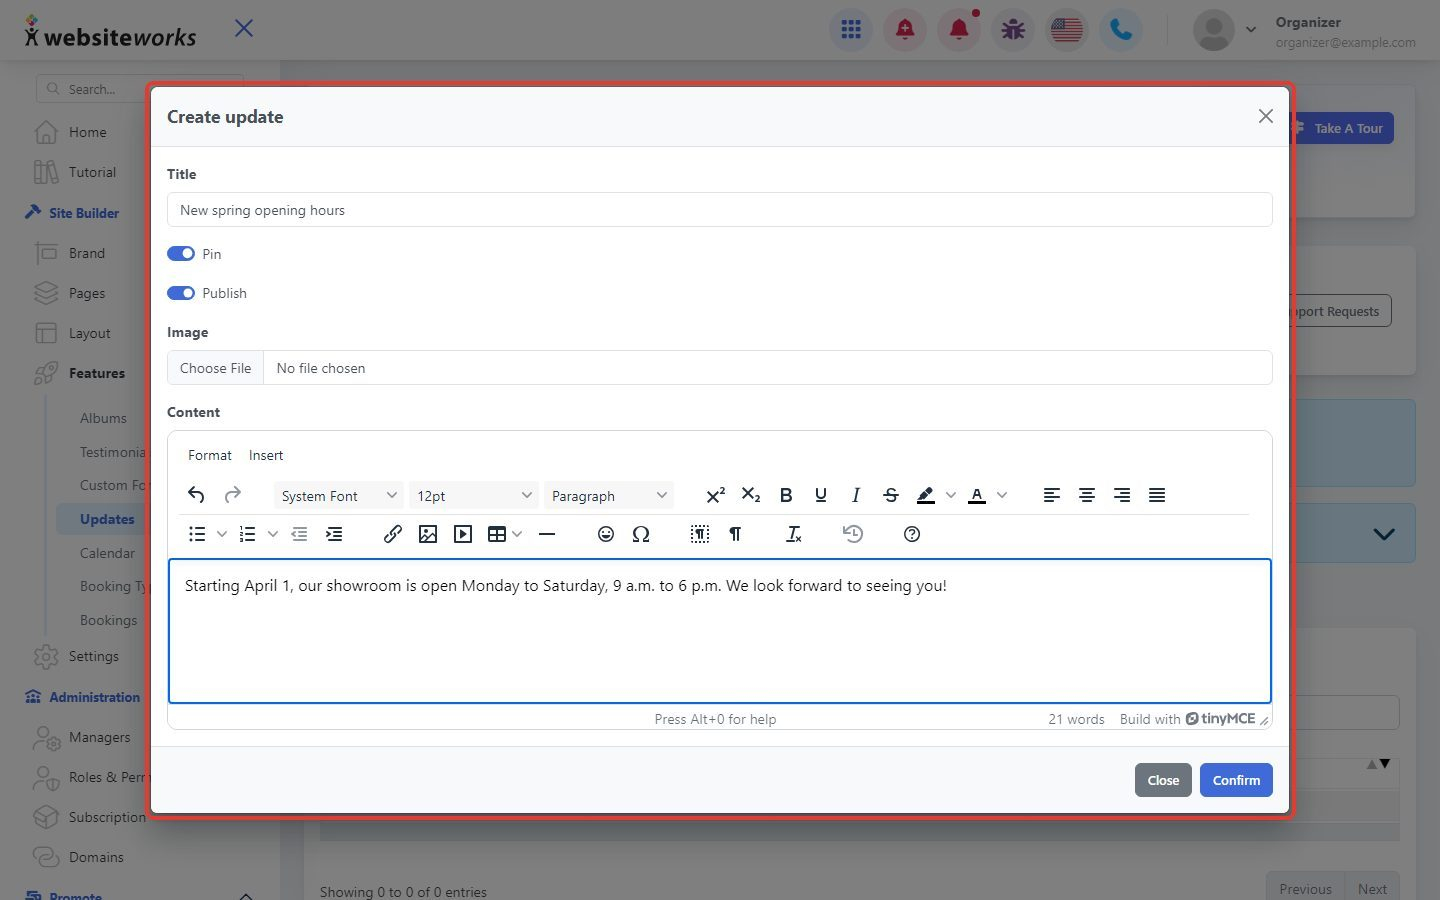
- Title: the headline visitors see.
- Image: click Choose File to add a picture (optional).
- Content: write your message. Use the toolbar to add bold text, lists or links.
Step 4: Pin and publish
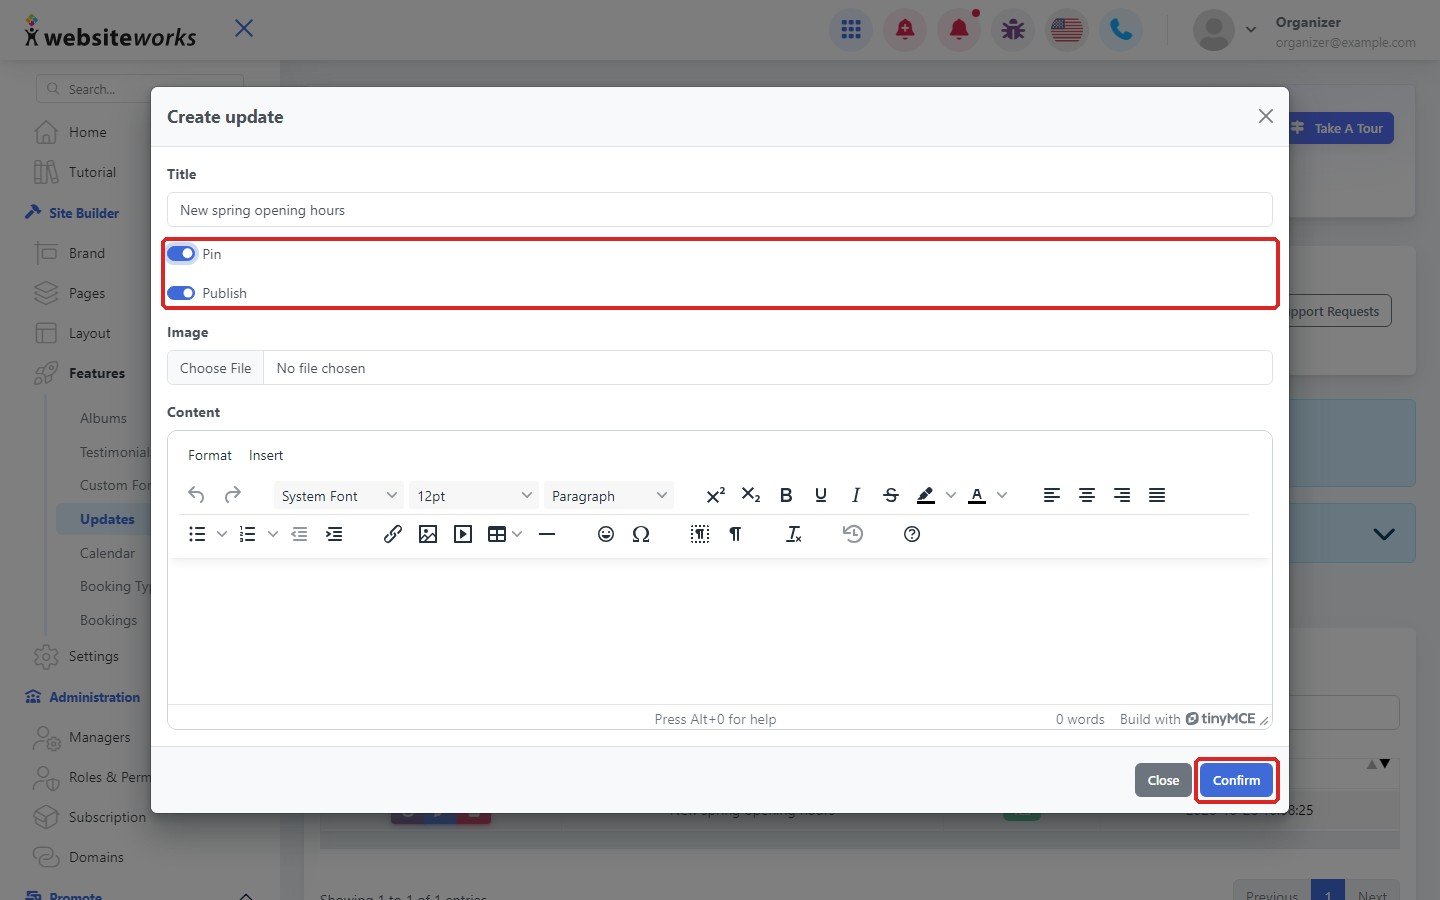
Turn on Pin to keep this update at the top of the list. Turn on Publish to show it on your website. Leave Publish off to keep it as a draft. Click Confirm to save.
Step 5: Edit or delete an update
Your updates are listed with their Title, Pinned status and Publish date. Use the buttons in the Actions column to see the History of changes, Manage (edit) the update or Delete it. Click Actions Guide to see what each button does.
Step 6: Show your updates on a page
Updates only appear on your website where you add the Updates block. Open Pages and click New Editor next to the page where you want it. Choose Manual Forms, click Add block, open the Features tab and click the Updates block. When the page looks right, click Publish Changes.
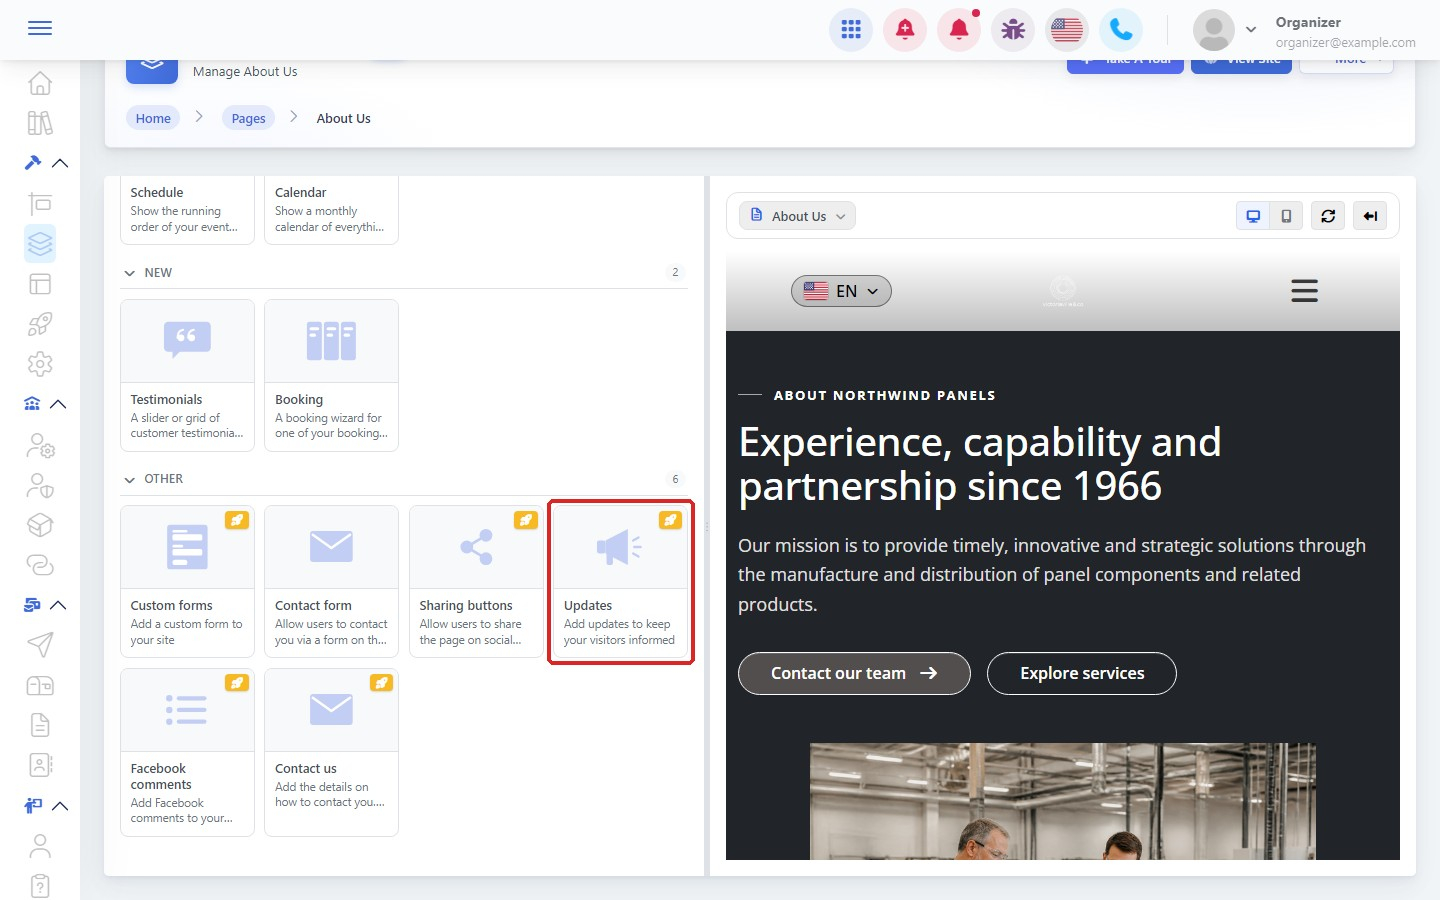
Tip: You only need to add the block once. New updates you publish appear there automatically.