

Your website can show a monthly calendar. Add your own entries, like an open house, a holiday closure or a workshop, in Features > Calendar. Visitors see them when you add the Calendar block to a page.
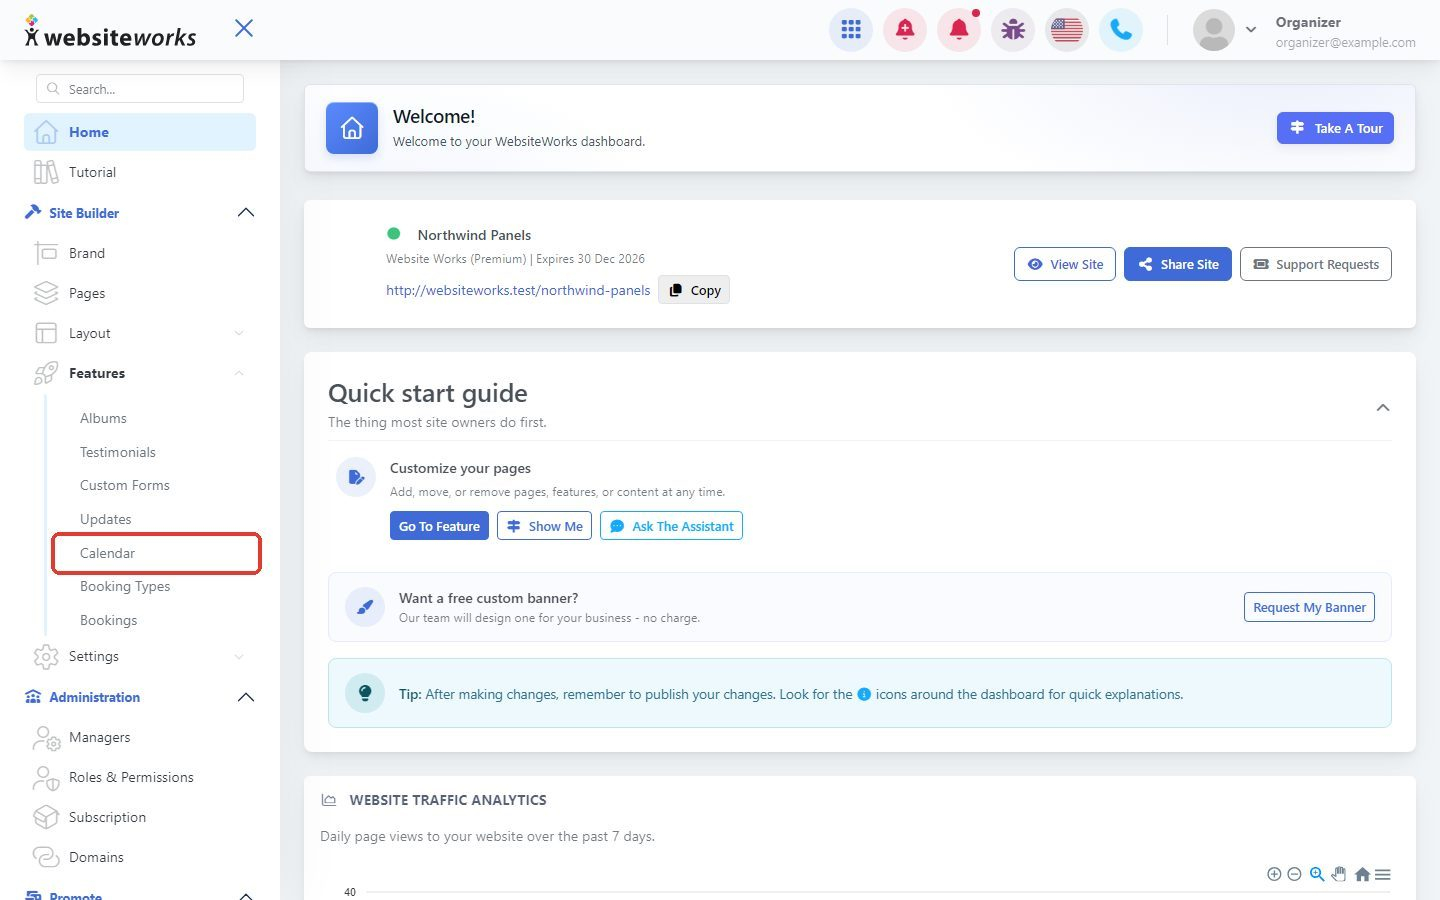
Step 1: Open Calendar
In the menu, click Features, then Calendar.
Step 2: Create a calendar entry
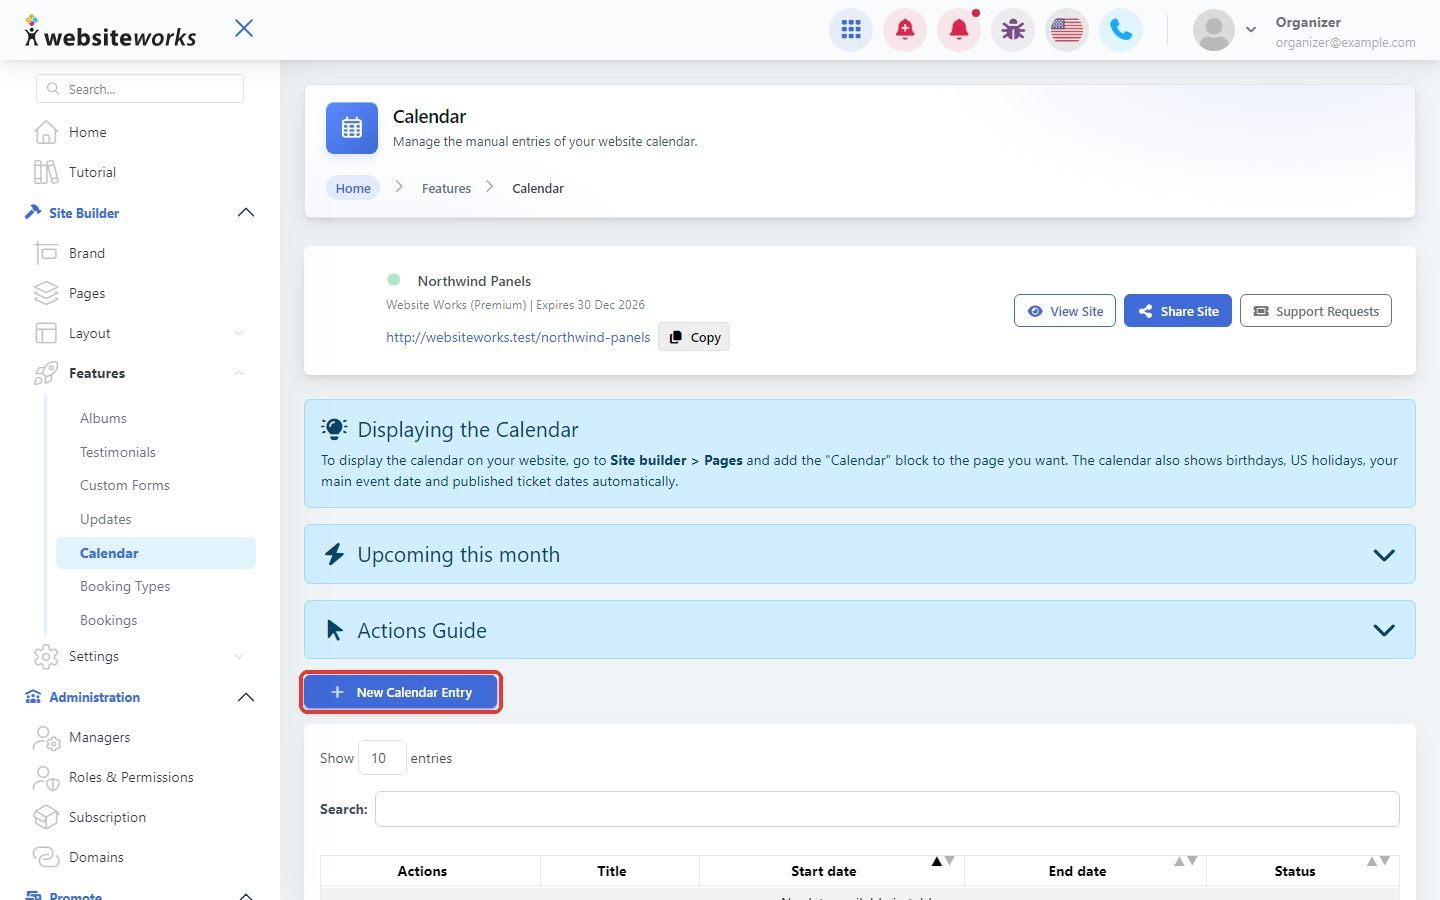
Click New Calendar Entry.
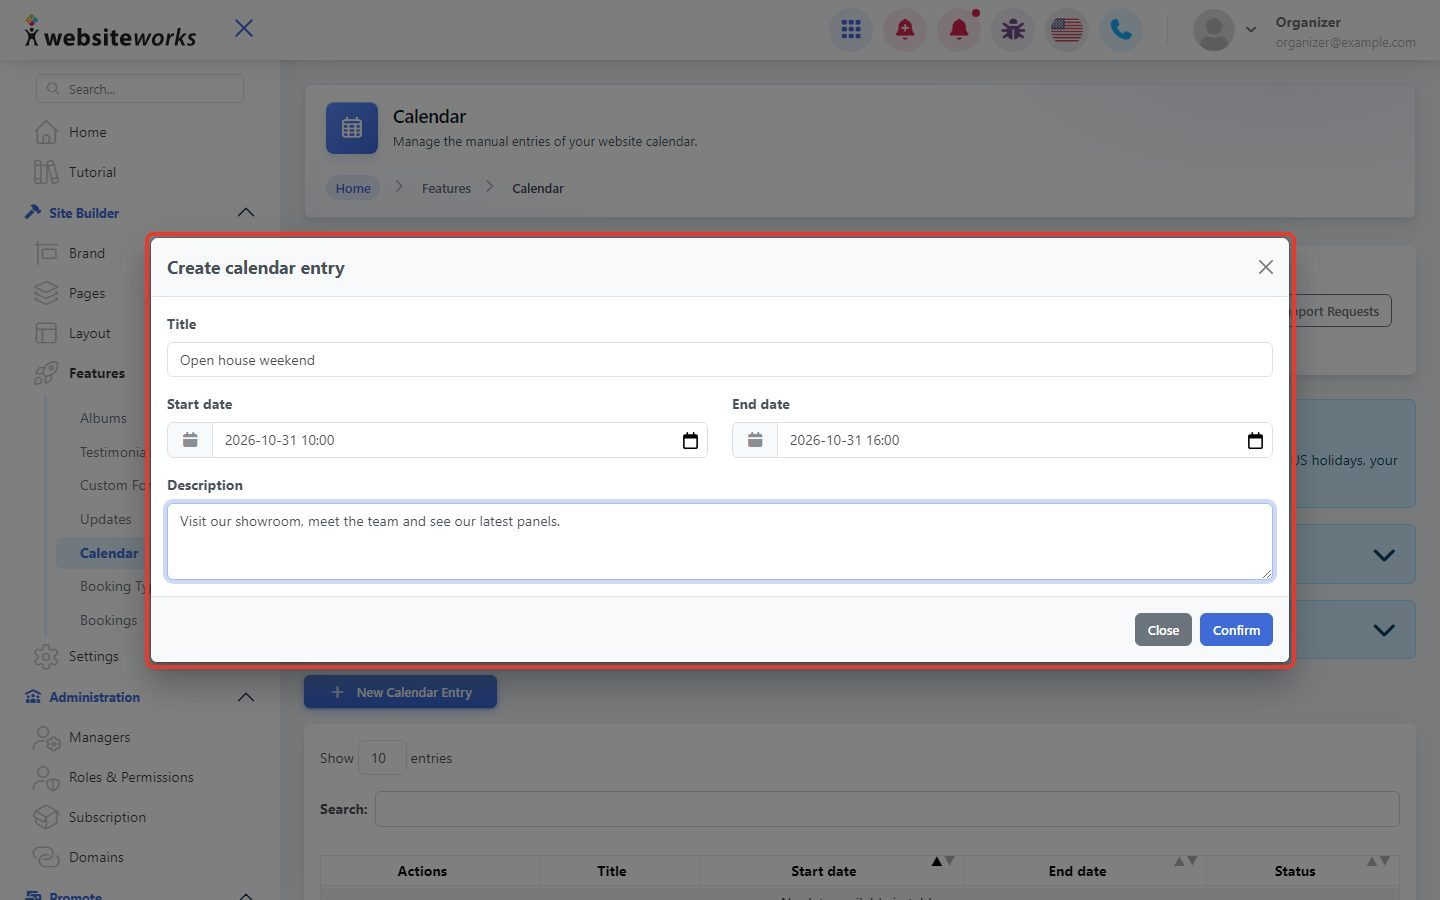
Step 3: Fill in the details
In the Create calendar entry window, enter a Title, pick the Start date and End date with their times, and add a Description if you want. Click Confirm.
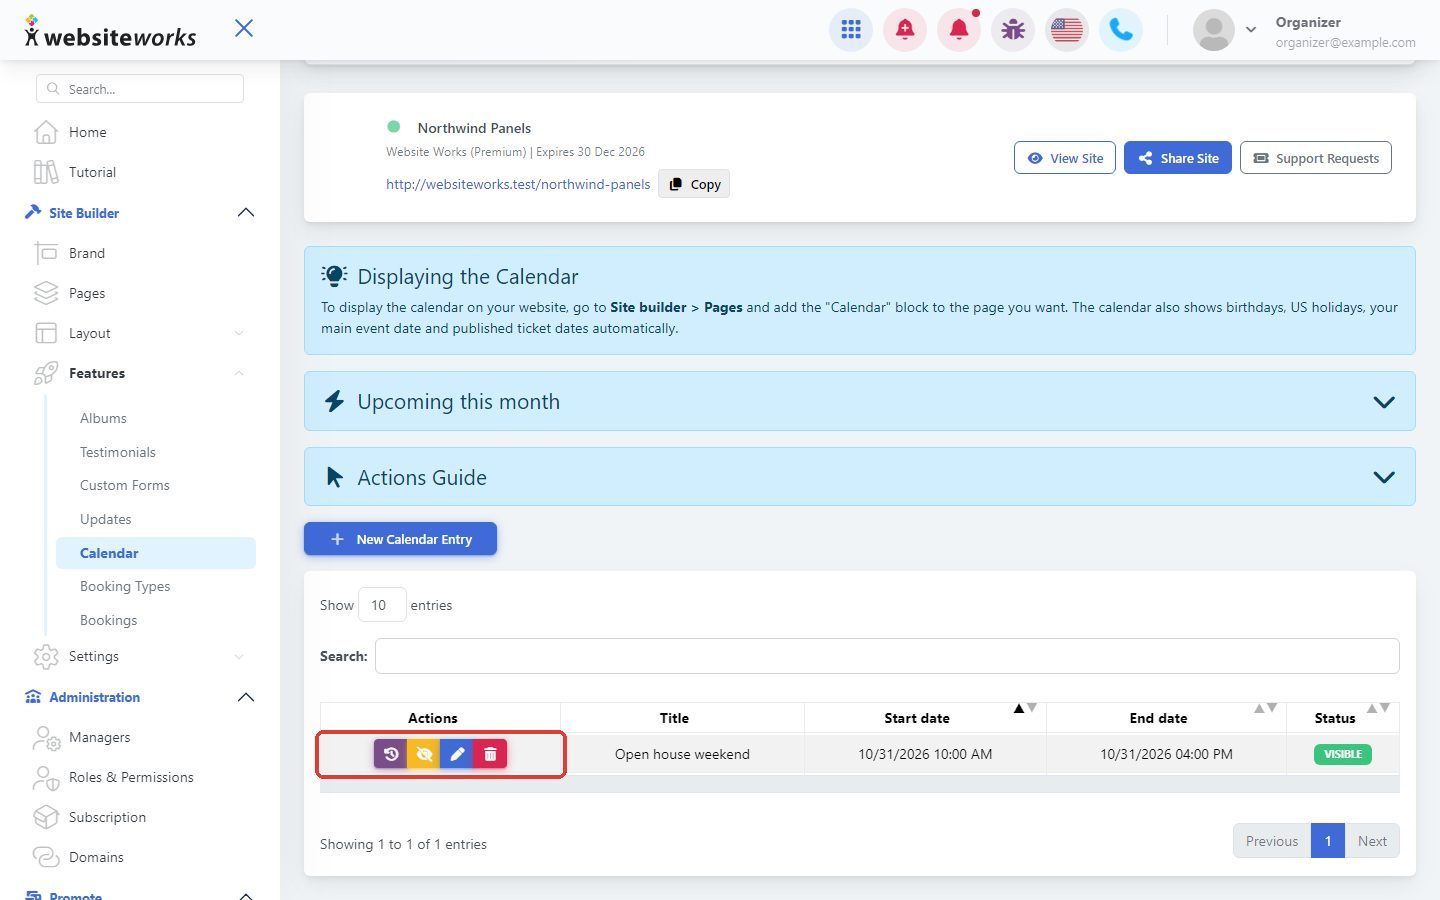
Step 4: Manage your entries
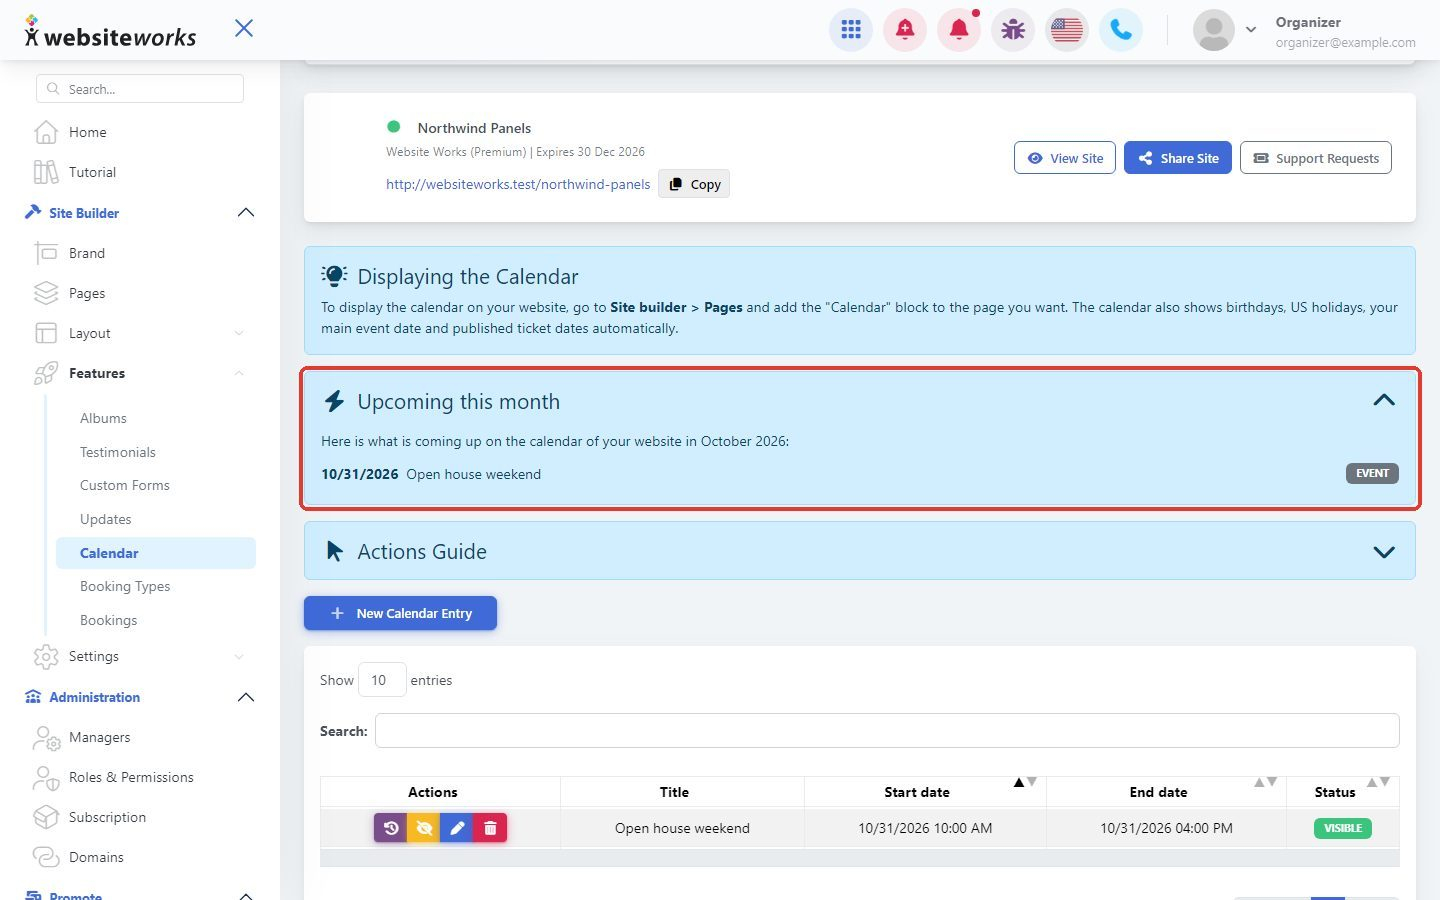
Your entries are listed with their Start date, End date and Status. Use the buttons in the Actions column to see the History, Hide From Calendar (or show it again), Manage (edit) or Delete an entry. Hidden entries stay in your list but are not shown on your website.
Step 5: Check what is coming up
Open Upcoming this month to see everything on your calendar for the current month.
Step 6: Show the calendar on a page
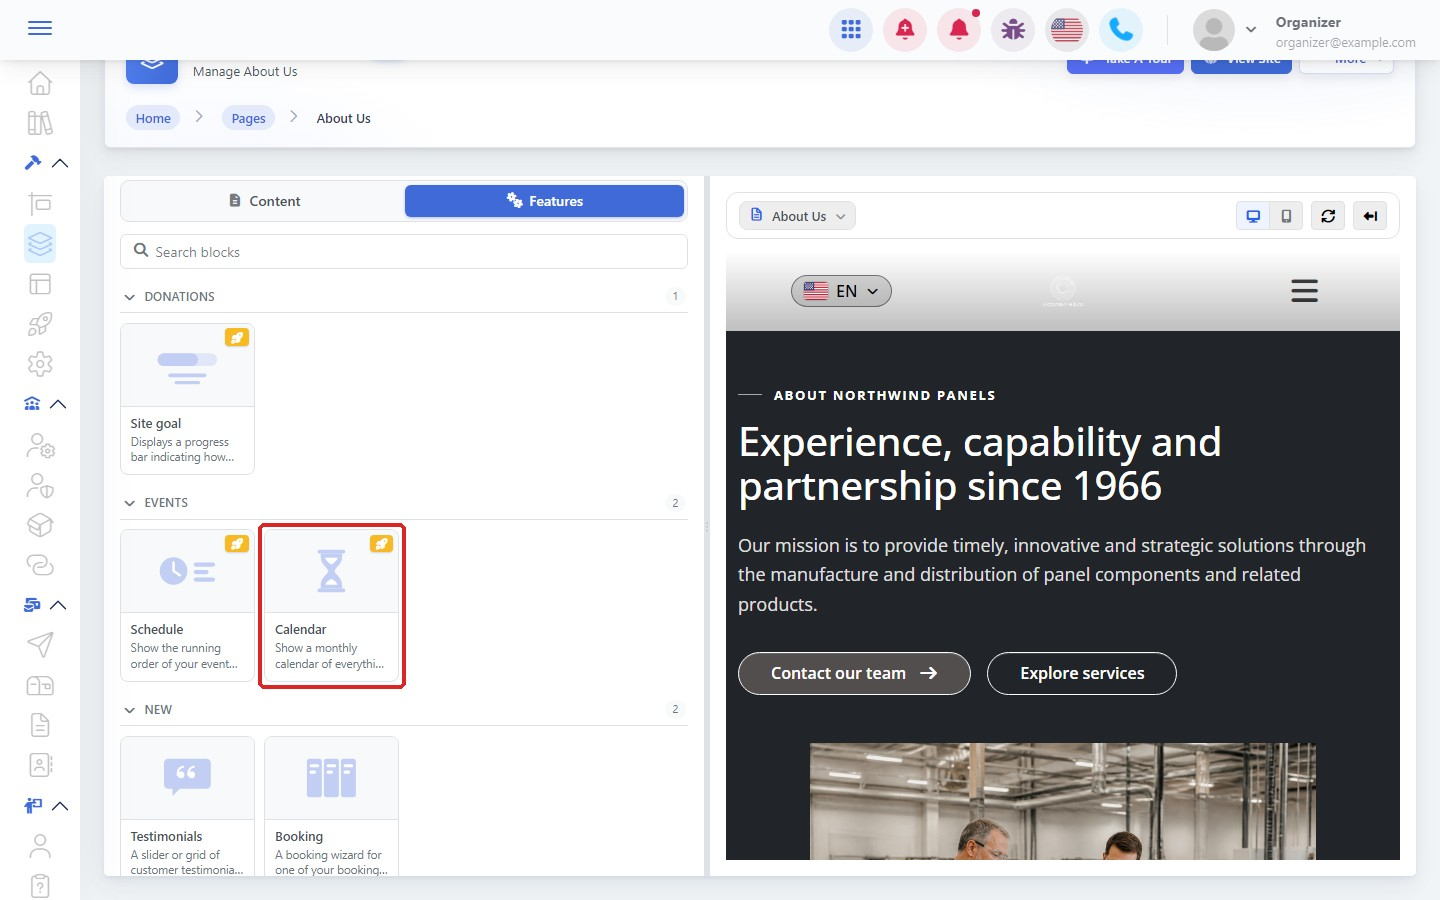
Open Pages and click New Editor next to the page where you want it. Choose Manual Forms, click Add block, open the Features tab and click the Calendar block. When the page looks right, click Publish Changes.
Good to know: Besides your own entries, the calendar also shows birthdays, US holidays, your main event date and published ticket dates automatically.