

A booking type is something visitors can book on your website, like a consultation, a visit or a class. Each booking type has its own duration, capacity and opening hours. Visitors pick a date and a free time, answer your questions and their booking is confirmed right away.
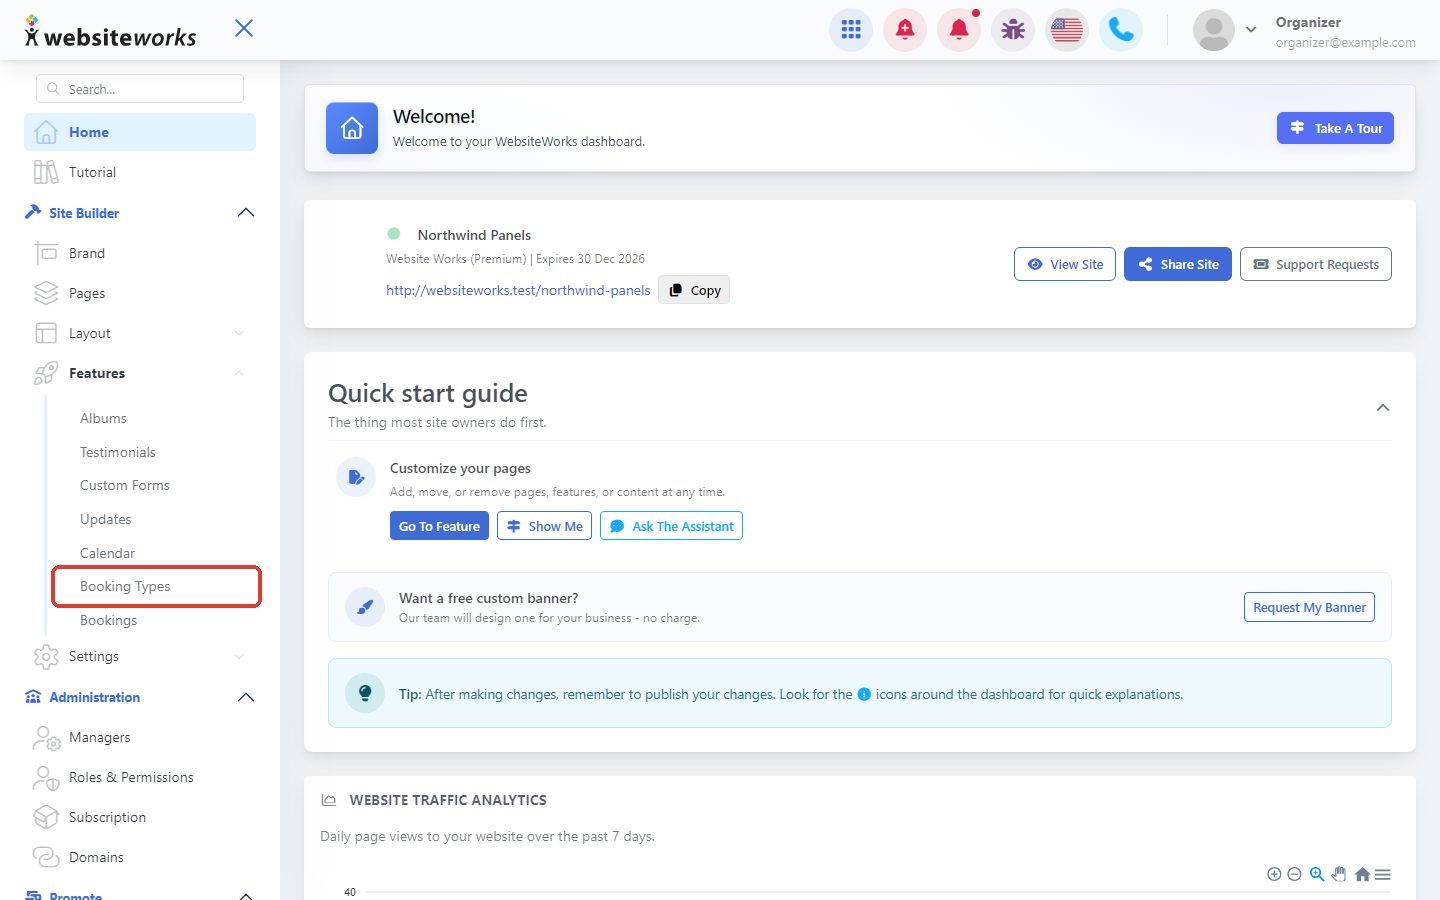
Step 1: Open Booking Types
In the menu, click Features, then Booking Types.
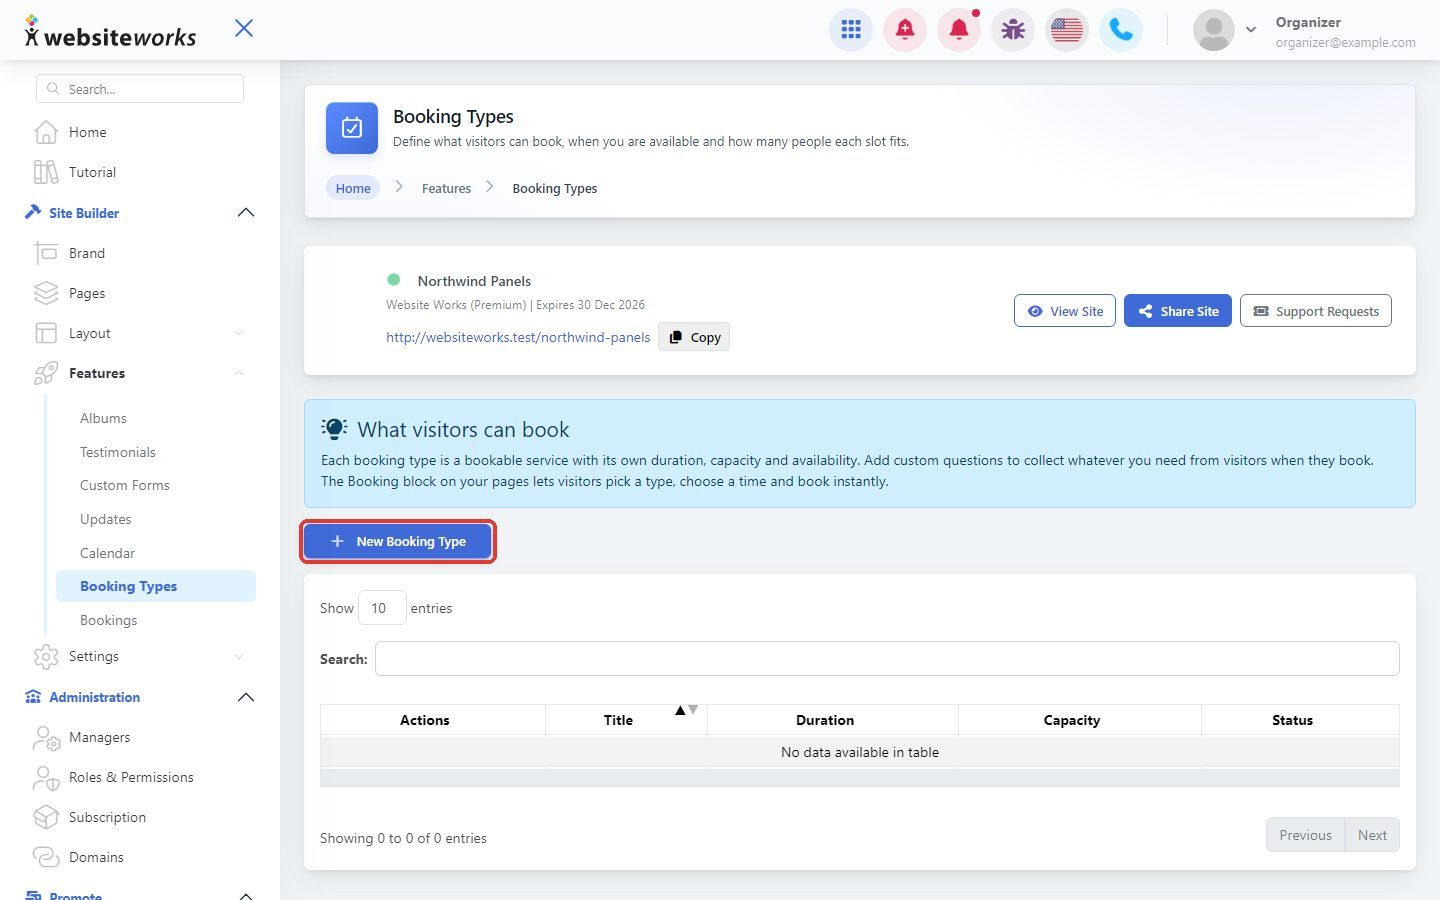
Step 2: Create a booking type
Click New Booking Type.
Step 3: Describe what visitors book
In the Create booking type window:
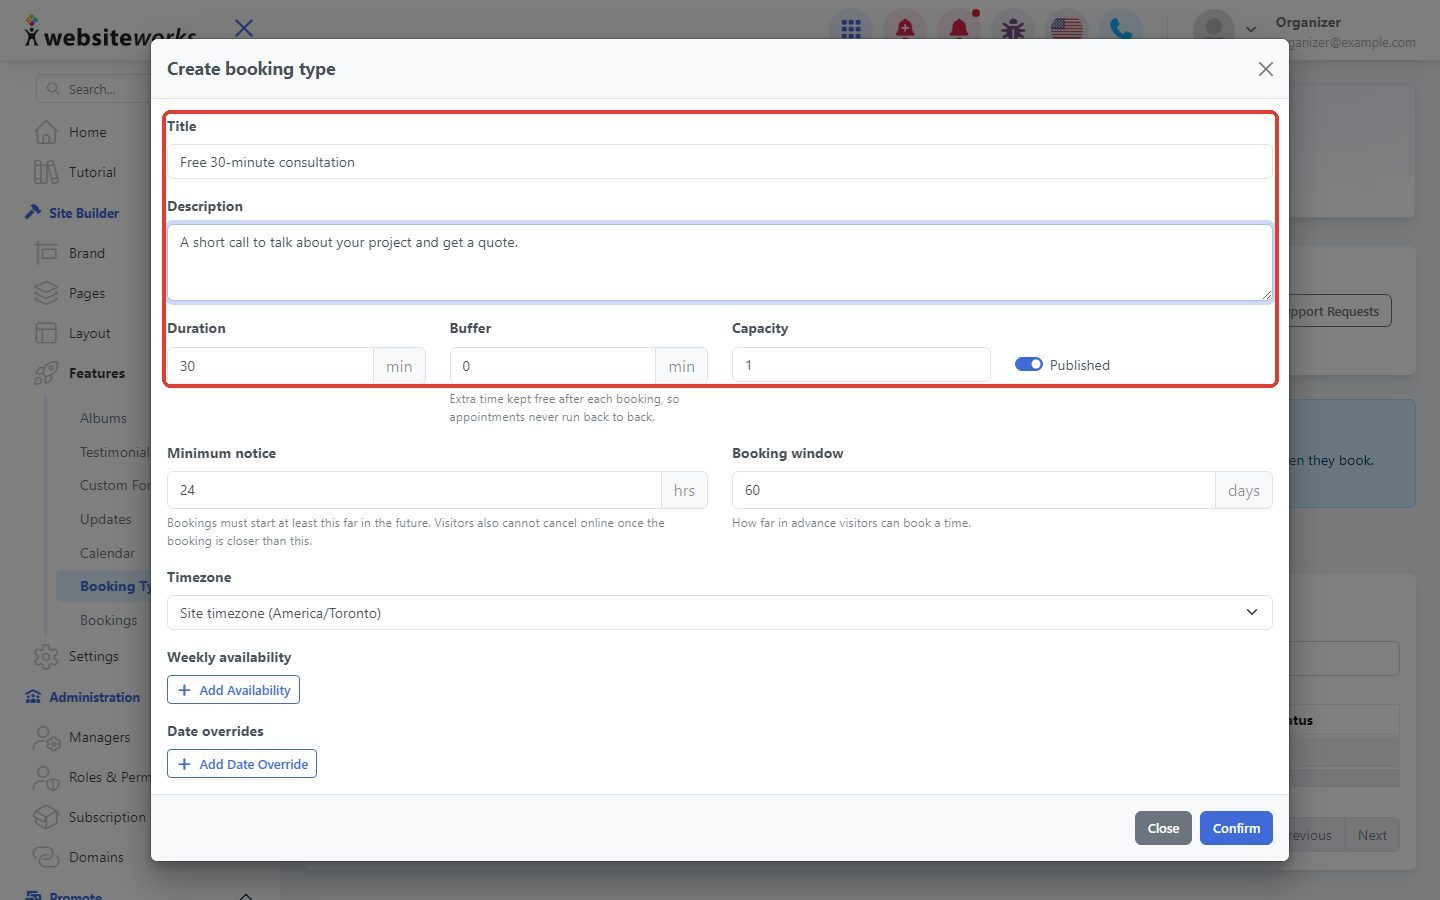
- Title and Description: what visitors are booking.
- Duration: how long each booking lasts, in minutes.
- Buffer: extra time kept free after each booking, so appointments never run back to back.
- Capacity: how many people can book the same time slot. Use 1 for private appointments.
- Published: turn it on so visitors can book this type.
Step 4: Set your booking rules
Choose how far ahead people can book:
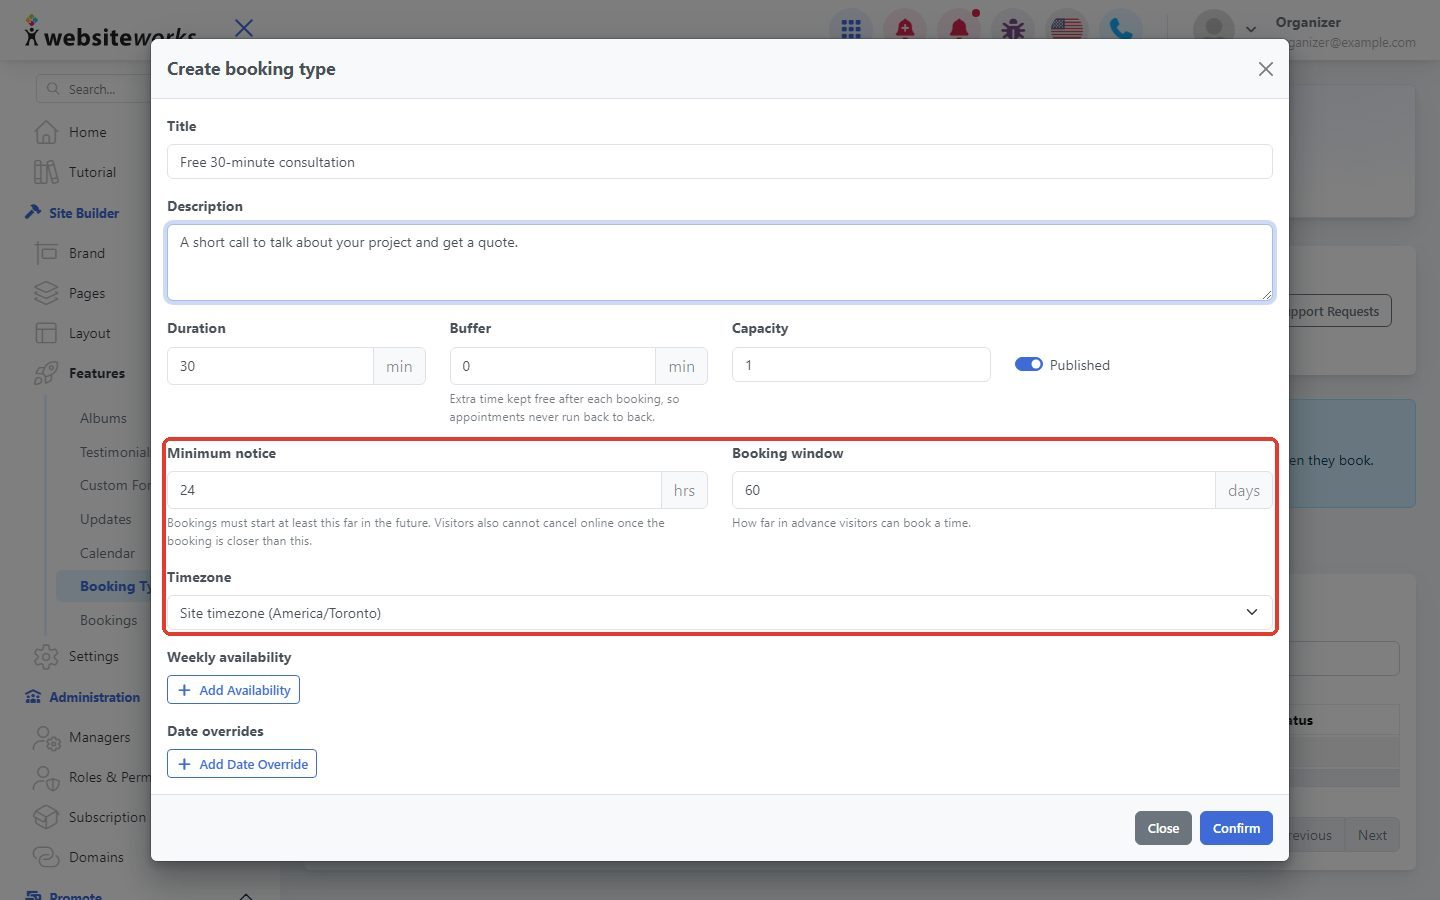
- Minimum notice: bookings must start at least this many hours from now. Visitors also cannot cancel online once the booking is closer than this.
- Booking window: how many days in advance visitors can book.
- Timezone: keep Site timezone or pick another one for this booking type.
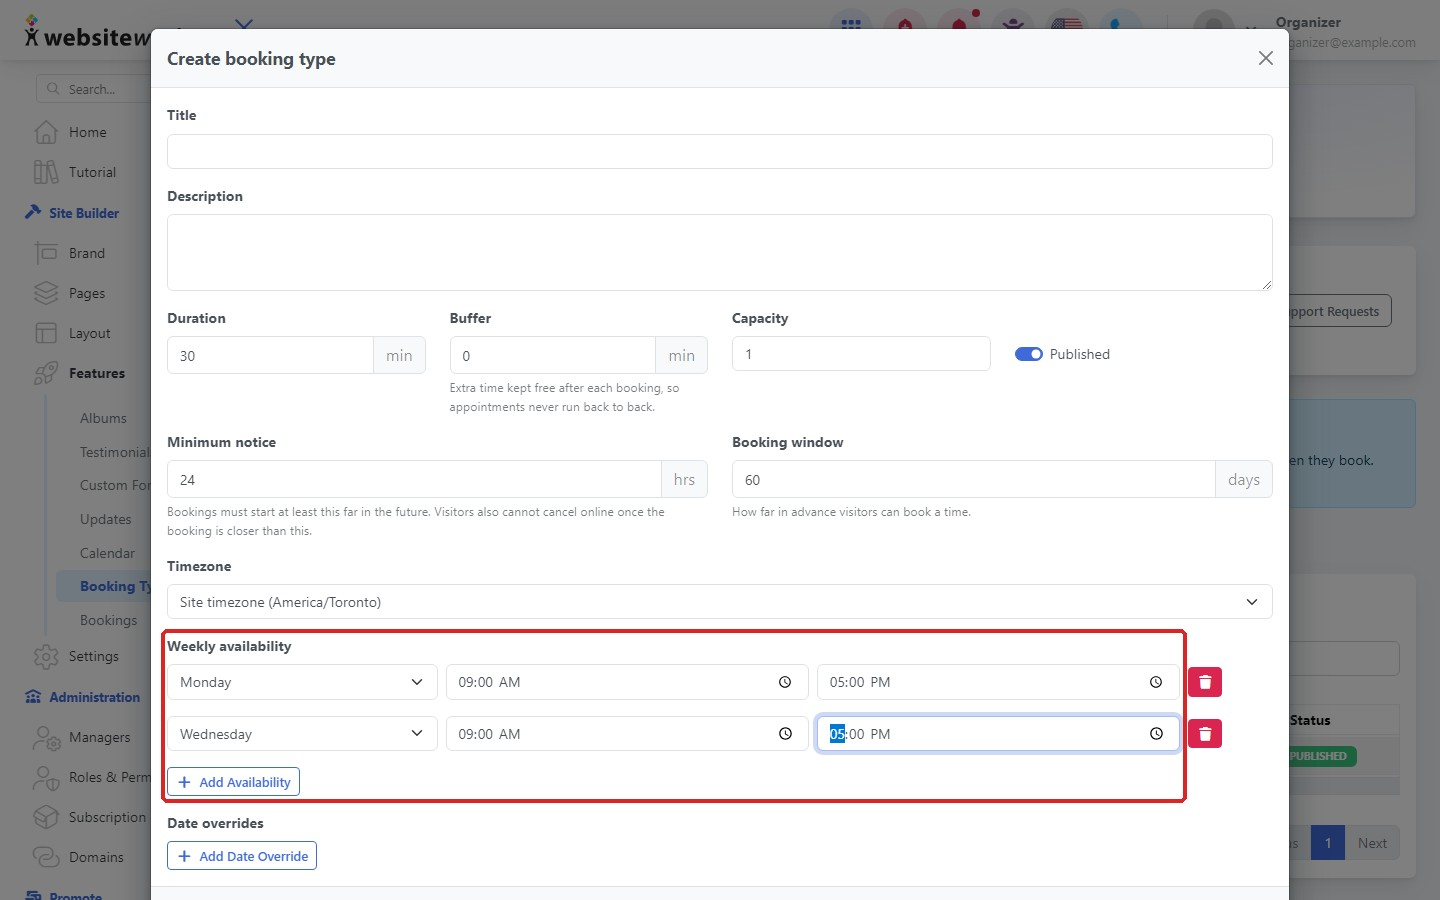
Step 5: Add your weekly availability
Under Weekly availability, click Add Availability. Choose a day, then the start and end time when people can book. Add one line for each day you are open. Click the red trash button to remove a line.
Step 6: Change the hours for a specific date
Under Date overrides, click Add Date Override to set different hours for one date, like shorter hours on a holiday eve. Pick the date and enter the start and end time. To close for the whole day, turn on Closed.
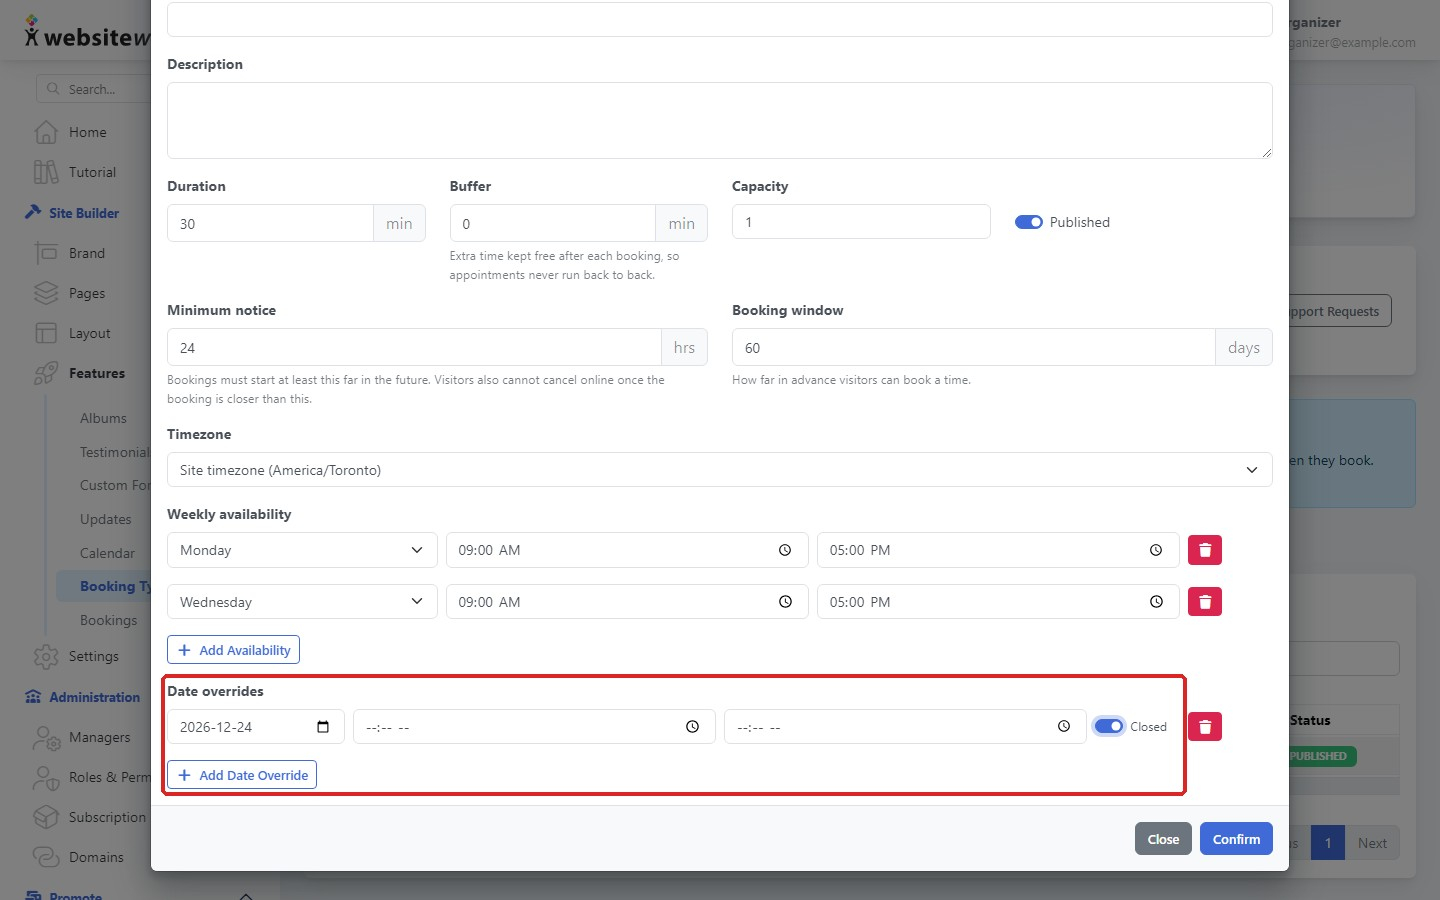
Tip: When you turn on Closed, also fill in a start and end time (any times). They are not used for a closed day, but the form needs them before it can be saved.
Click Confirm to save your booking type.
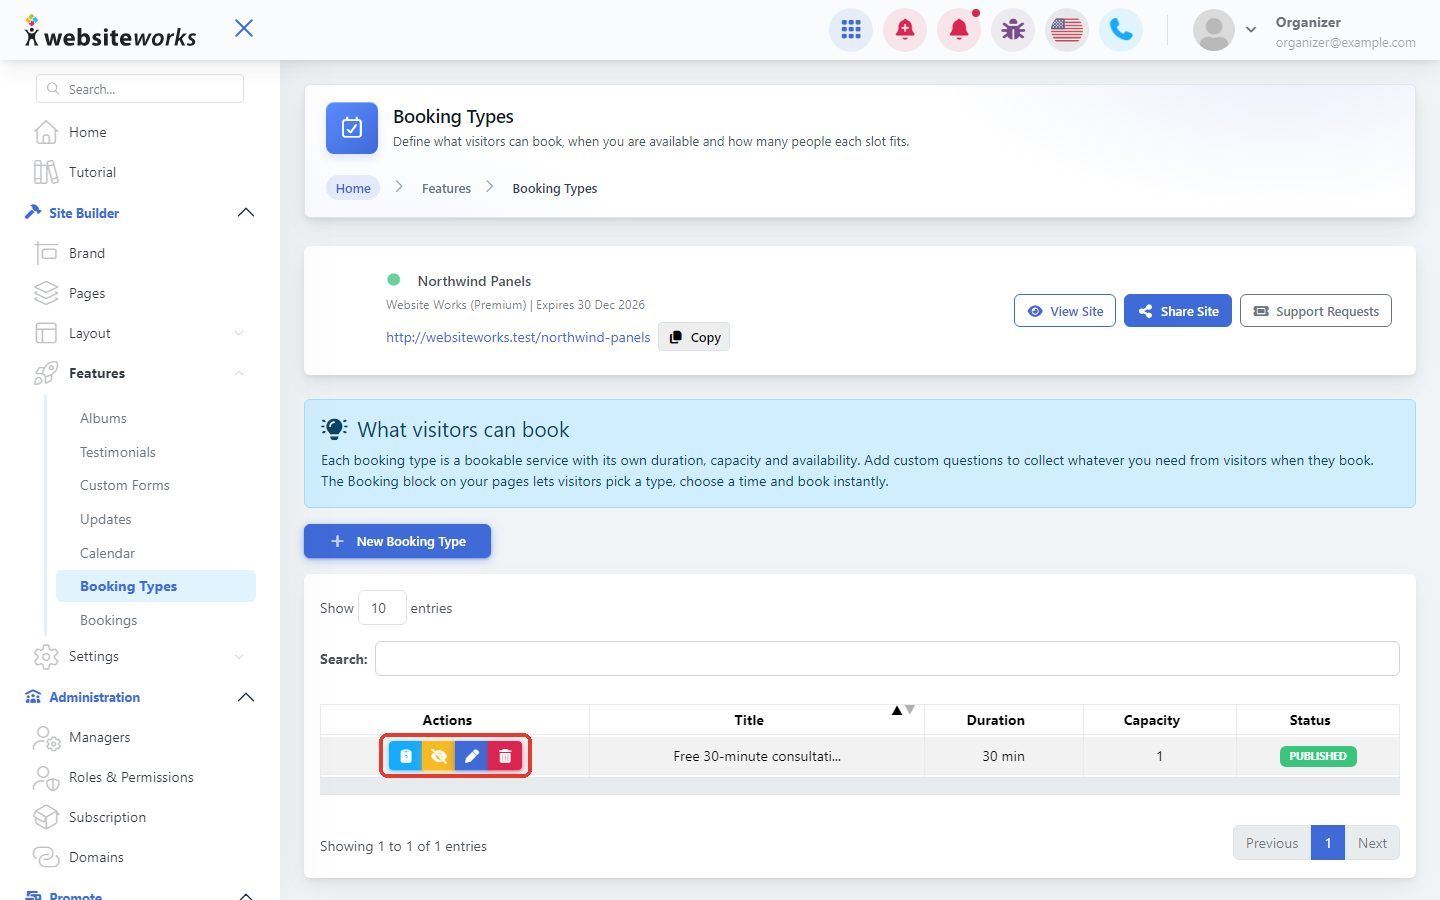
Step 7: Manage your booking types
Your booking types are listed with their Duration, Capacity and Status. The Actions buttons let you open the Questions, Publish or Unpublish, Manage (edit) or Delete a booking type.
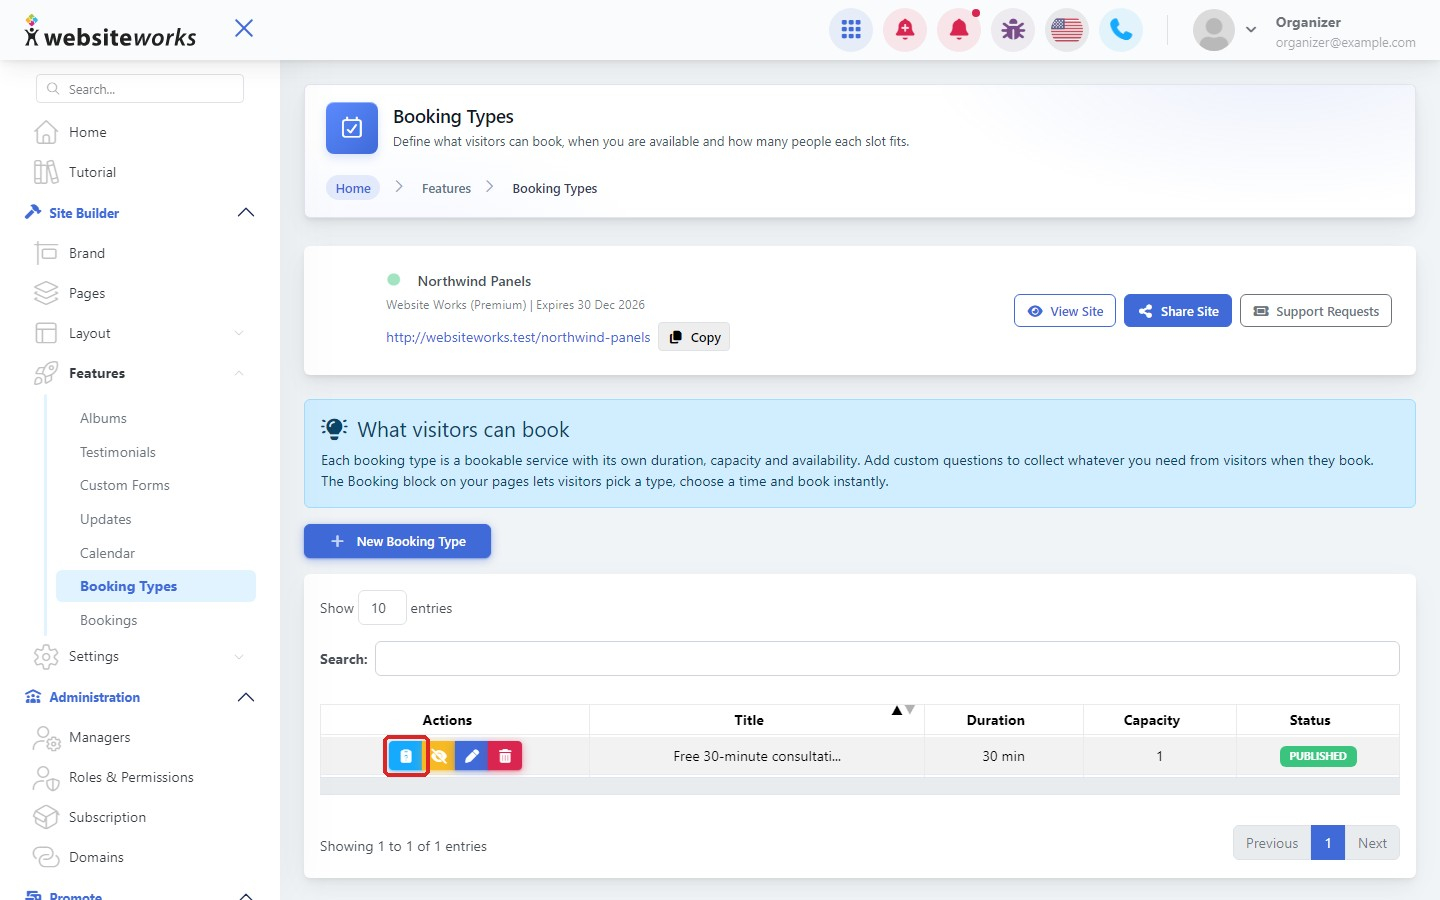
Step 8: Ask visitors questions when they book
Click the Questions button of your booking type, then click New Question.
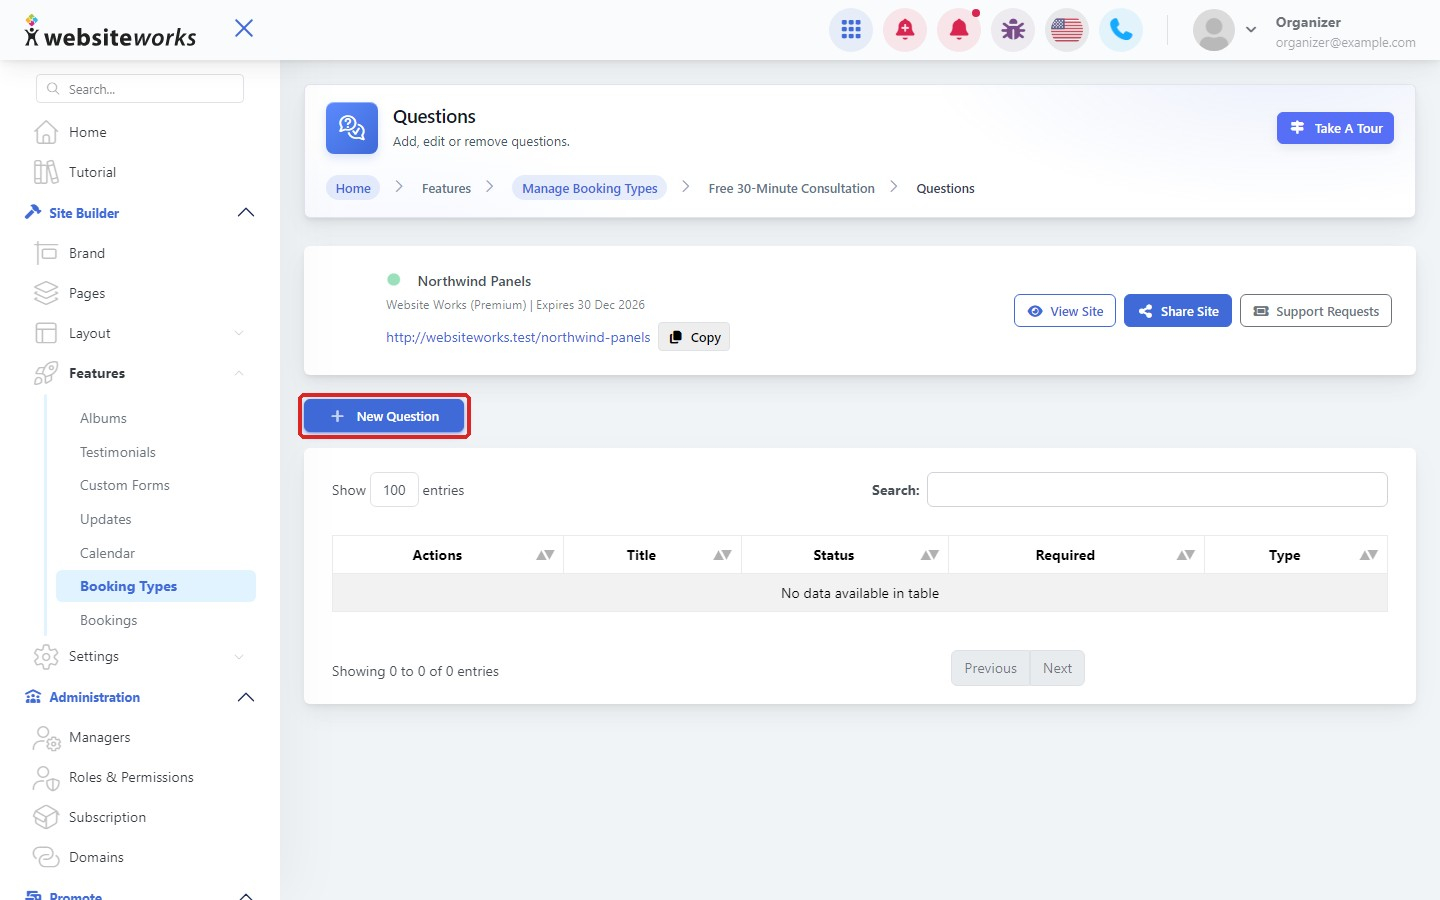
Step 9: Choose a question type
Pick a premade question, like Country & State / Province, or a custom question such as a Single-line text box, Dropdown list, Check boxes or Date. Click Select next to the one you want, then enter your question and save it. Visitors answer these questions when they book.
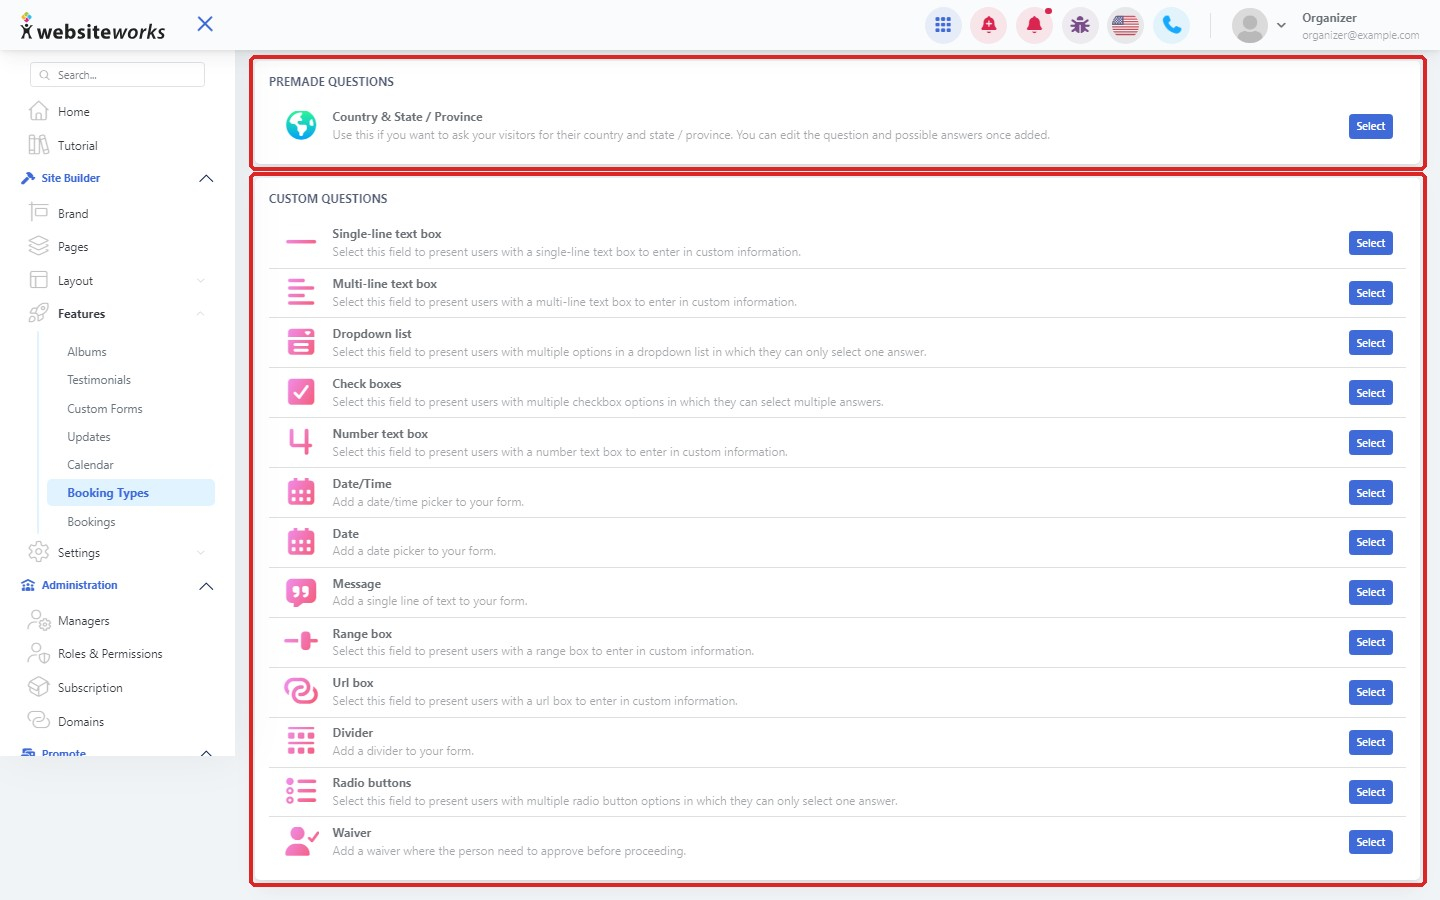
Step 10: Add the Booking block to a page
Open Pages and click New Editor next to the page where you want it. Choose Manual Forms, click Add block, open the Features tab and click the Booking block. When the page looks right, click Publish Changes. In the block settings, choose which Booking types to show and edit the title and description if you want.
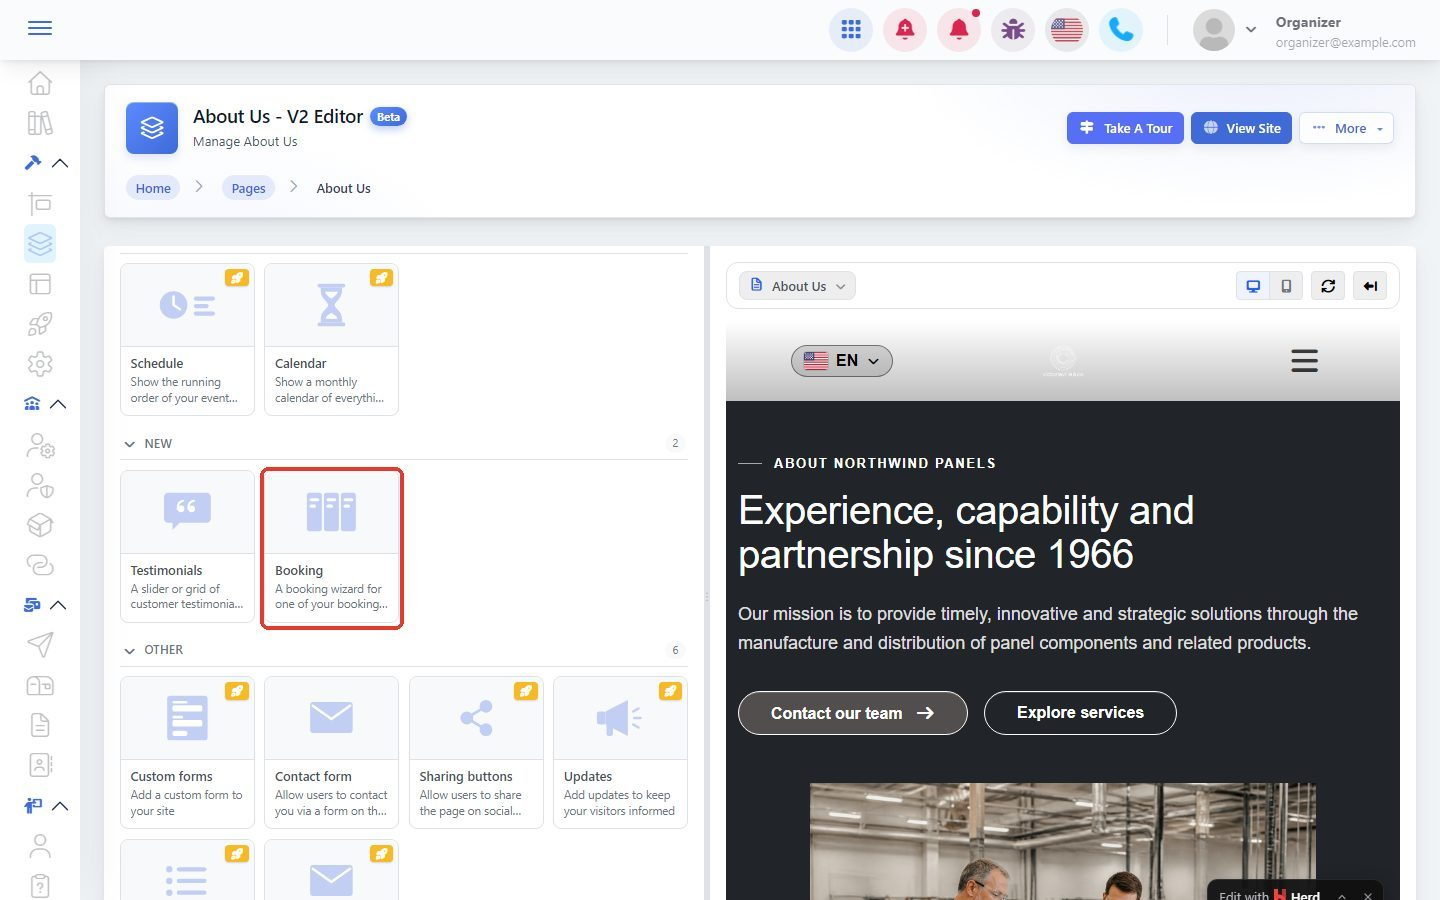
Good to know: Only published booking types can be picked in the block. Bookings are confirmed right away. You will find them in Features > Bookings.