

Every manager on your website has a role. The role decides what they can see and do in your dashboard. You can use one of the ready-made roles, or create your own.
Step 1: Open Roles & Permissions
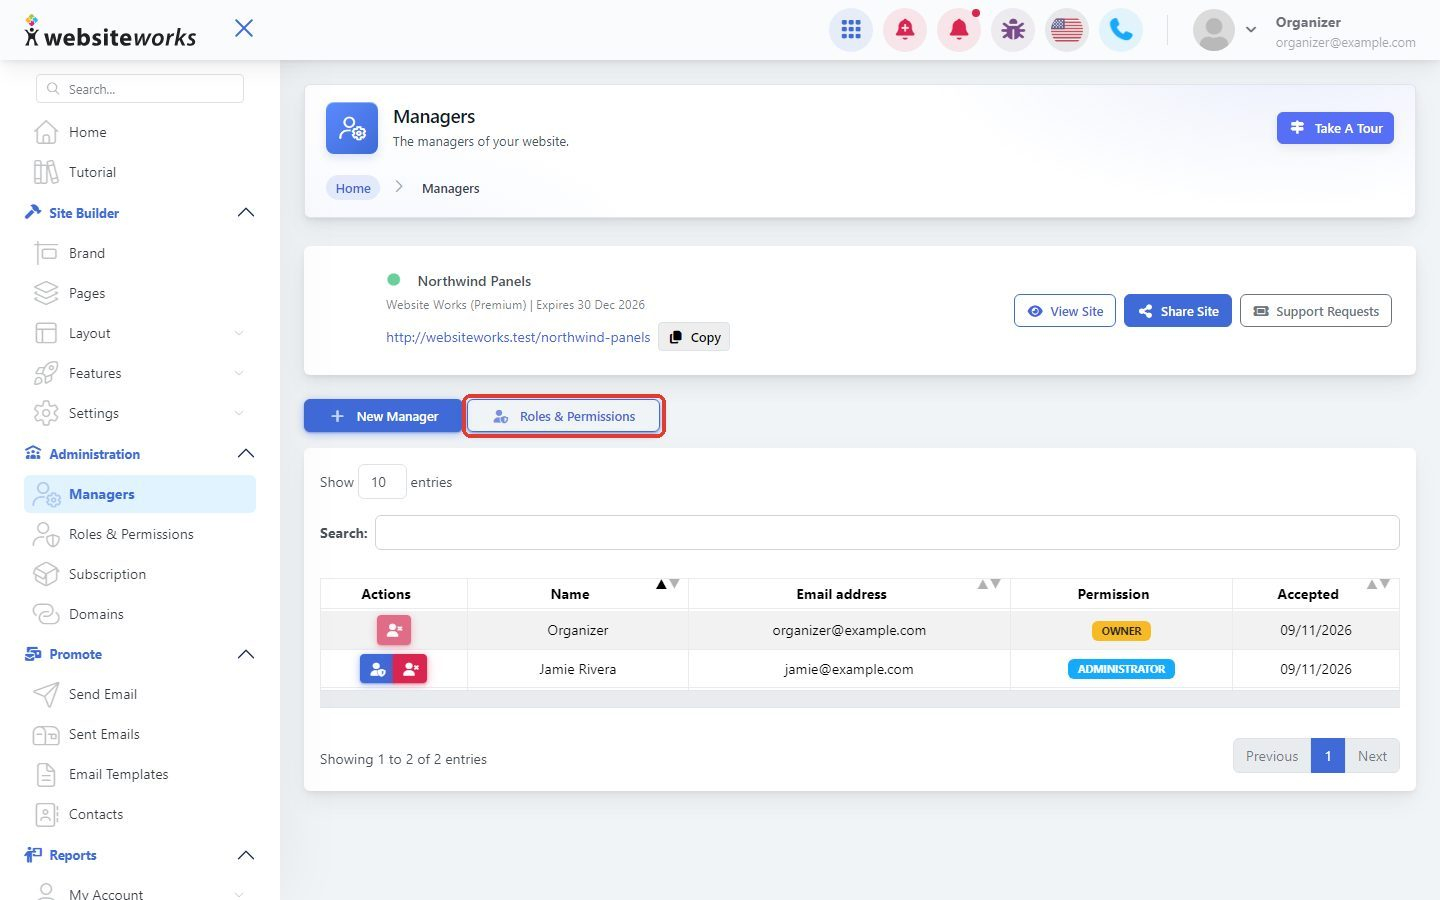
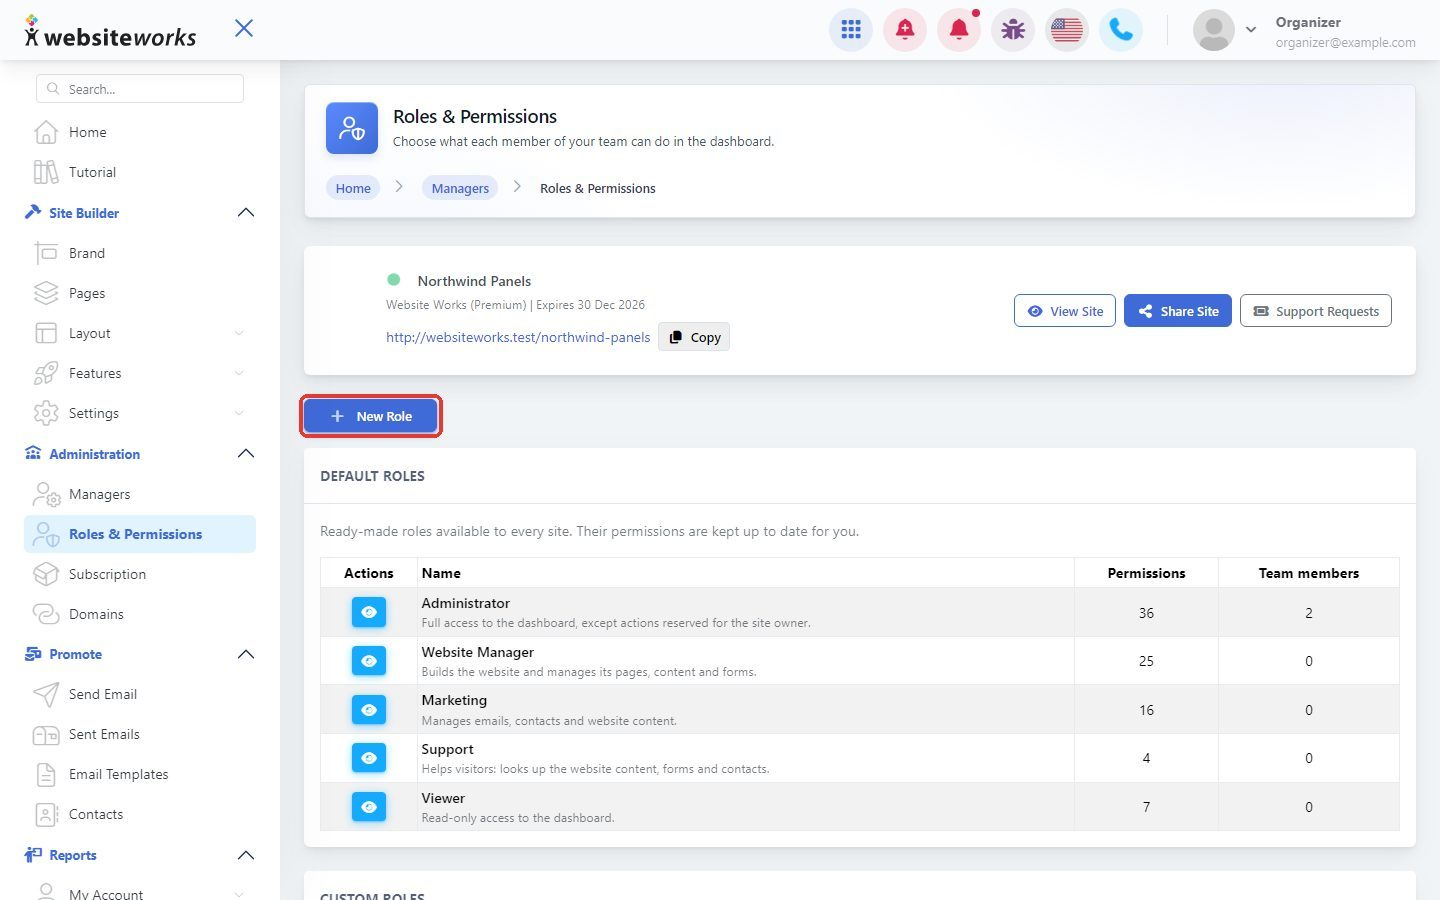
In the menu, under Administration, click Roles & Permissions. You can also click the Roles & Permissions button on the Managers page.
Step 2: Look at the ready-made roles
Under Default Roles you'll find five roles that every website has. Their permissions are kept up to date for you.
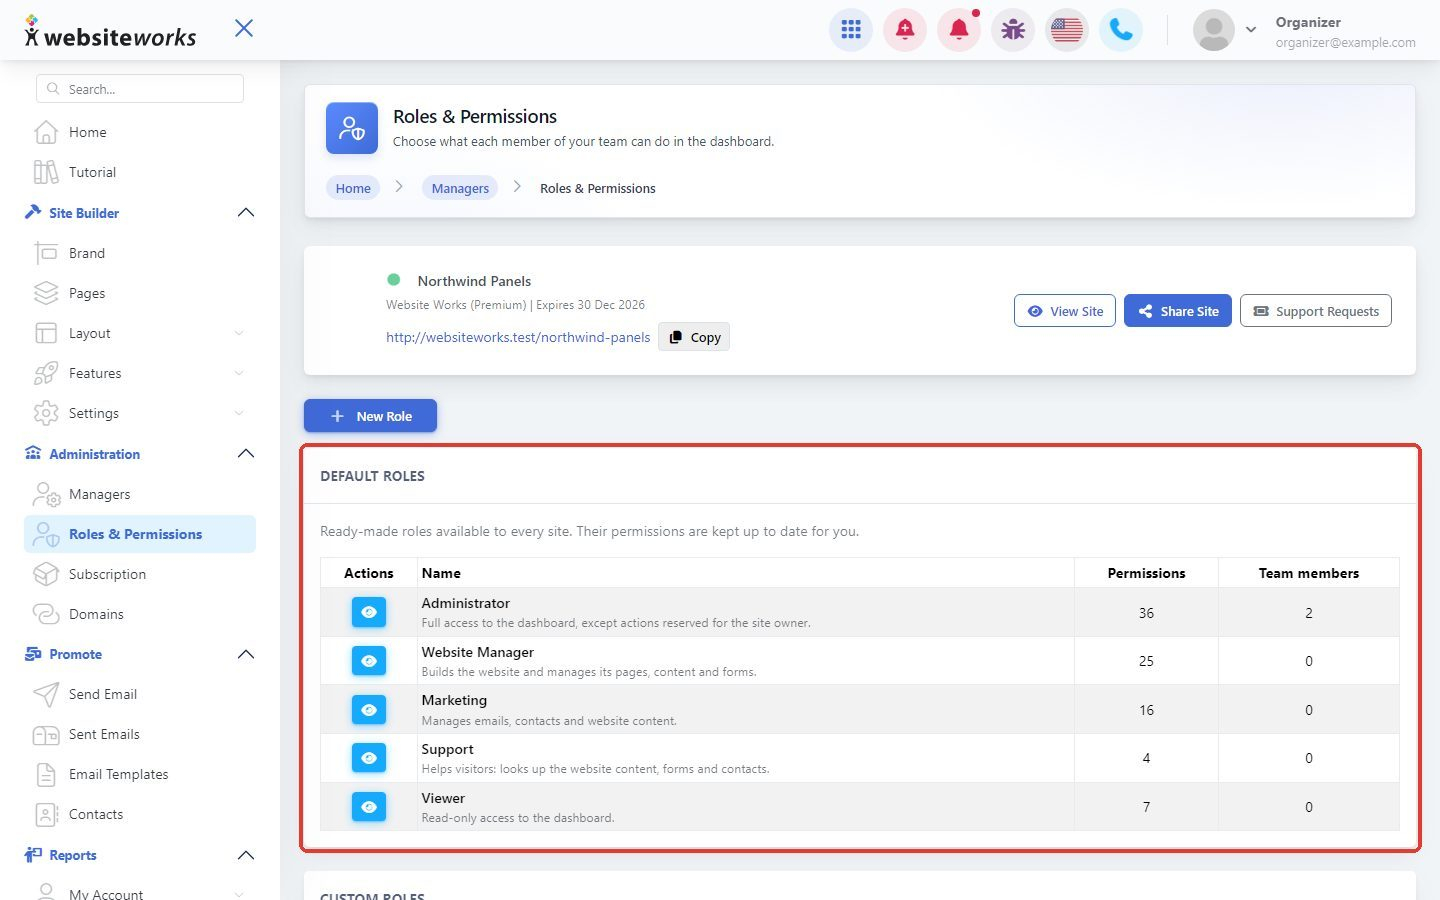
- Administrator: full access to the dashboard, except actions reserved for the site owner.
- Website Manager: builds the website and manages its pages, content and forms.
- Marketing: manages emails, contacts and website content.
- Support: helps visitors. Looks up the website content, forms and contacts.
- Viewer: read-only access to the dashboard.
The Permissions column shows how many permissions each role has, and Team members shows how many managers use it.
Step 3: See what a role can do
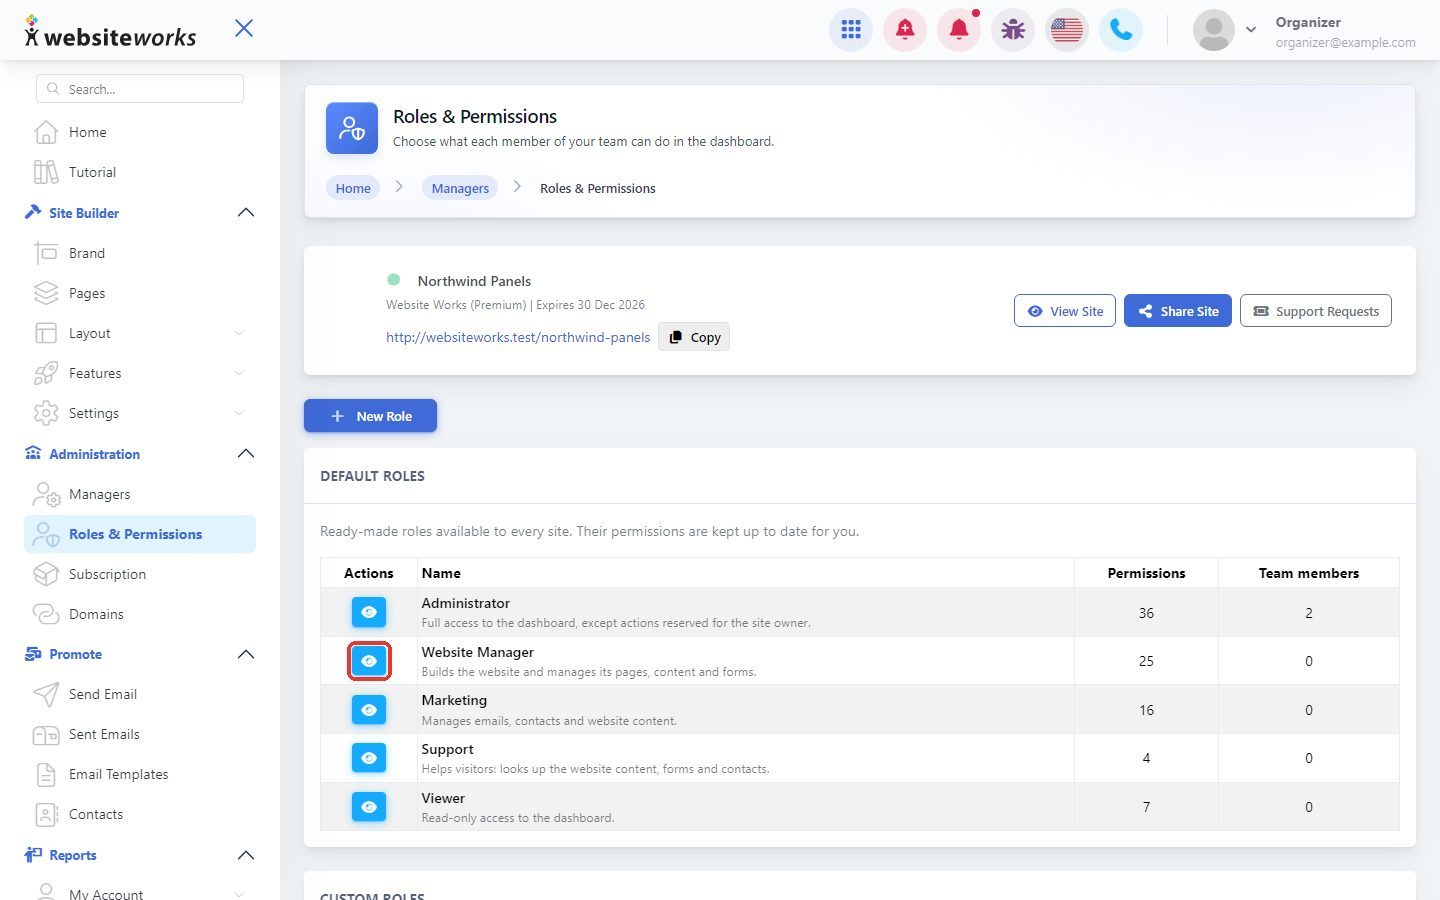
Click the View button next to a role.
Step 4: Read the permission list
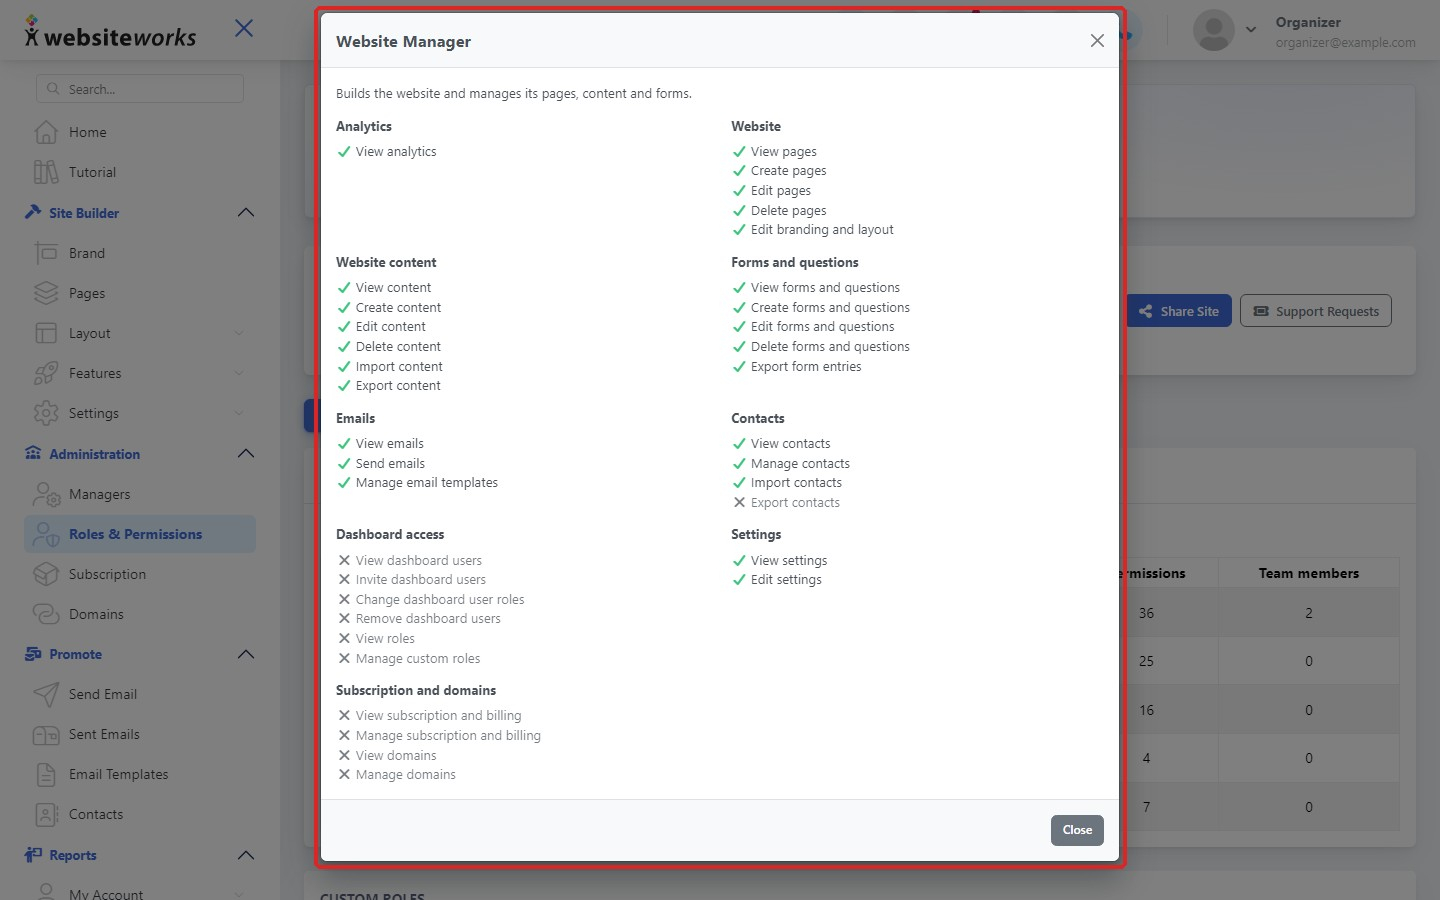
A window lists every permission, grouped by area. A green check means Allowed, a cross means Not allowed.
Step 5: Create your own role
If none of the ready-made roles fit, click New Role.
Step 6: Name your role
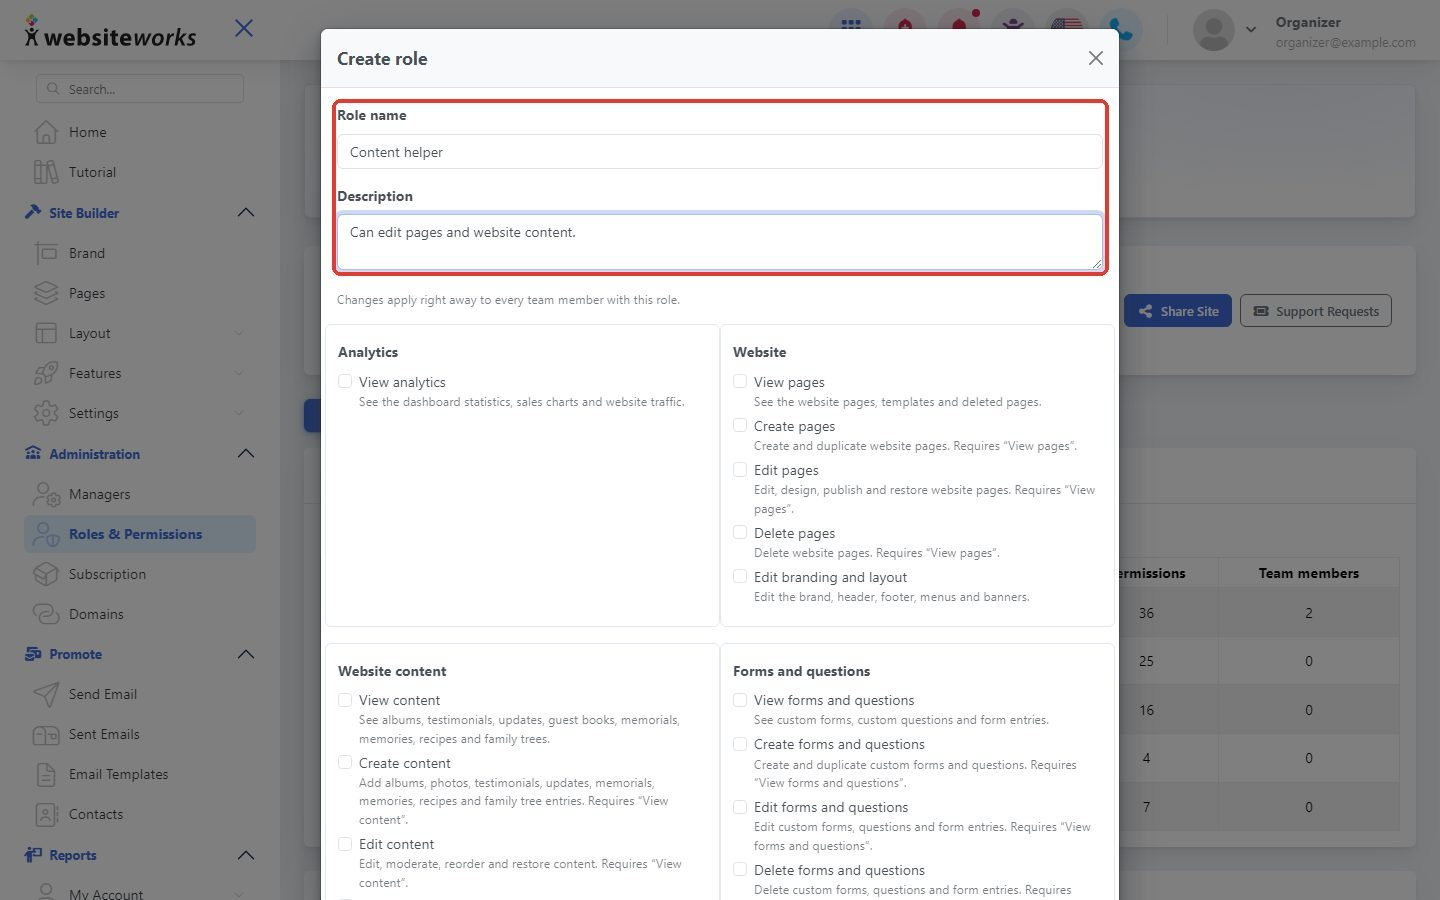
In the Create role window, enter a Role name and a short Description so you remember what it's for.
Step 7: Choose the permissions
Tick the permissions this role should have. They are grouped by area: Analytics, Website, Website content, Forms and questions, Emails, Contacts, Dashboard access, Settings and Subscription and domains.
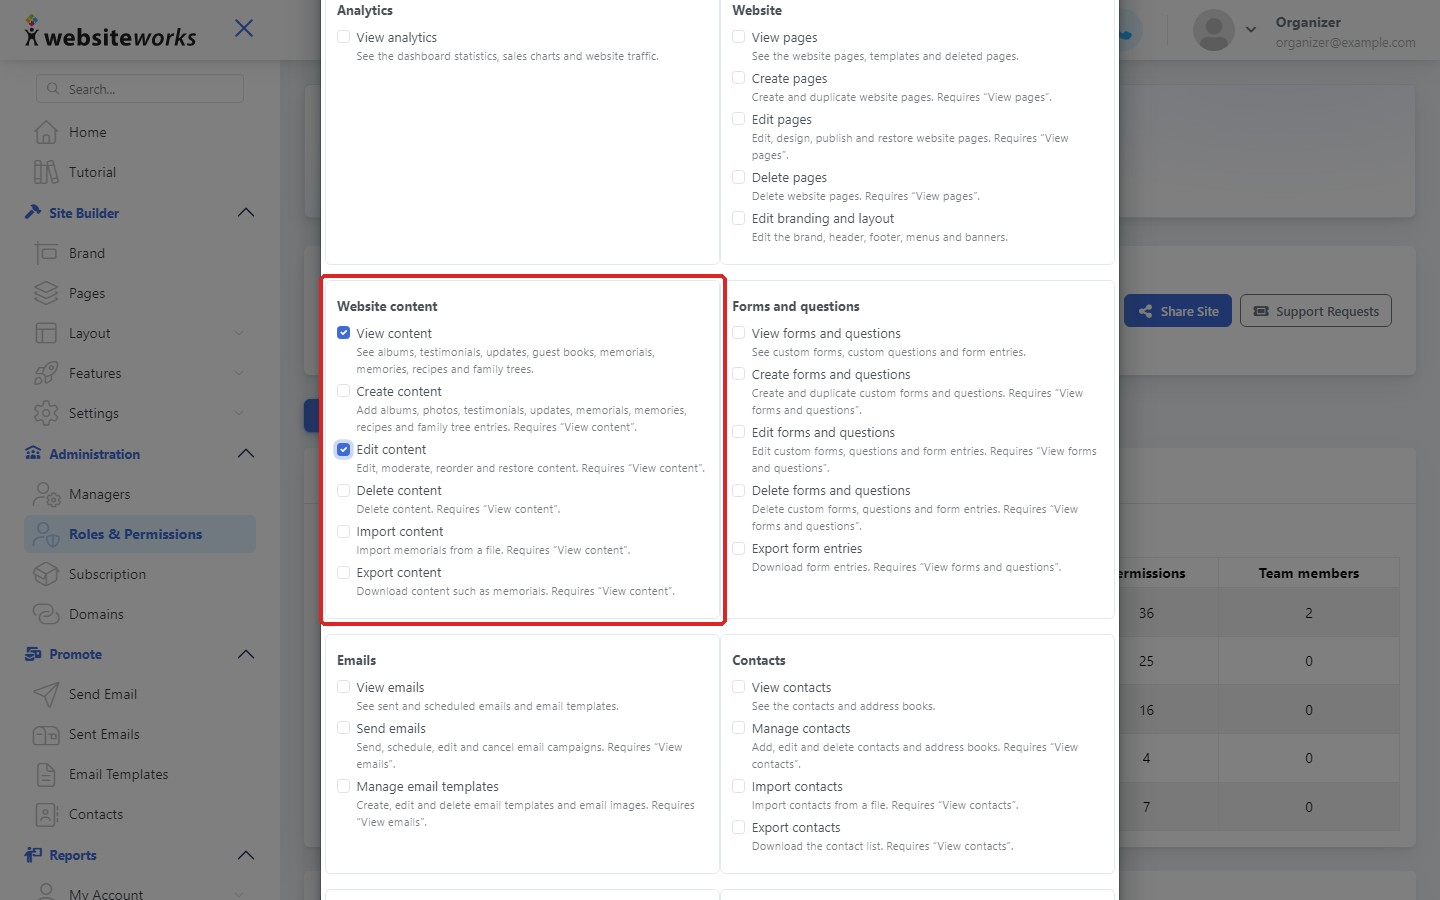
Some permissions need another one first. For example, Edit content says Requires "View content", so tick View content too.
Step 8: Save the role
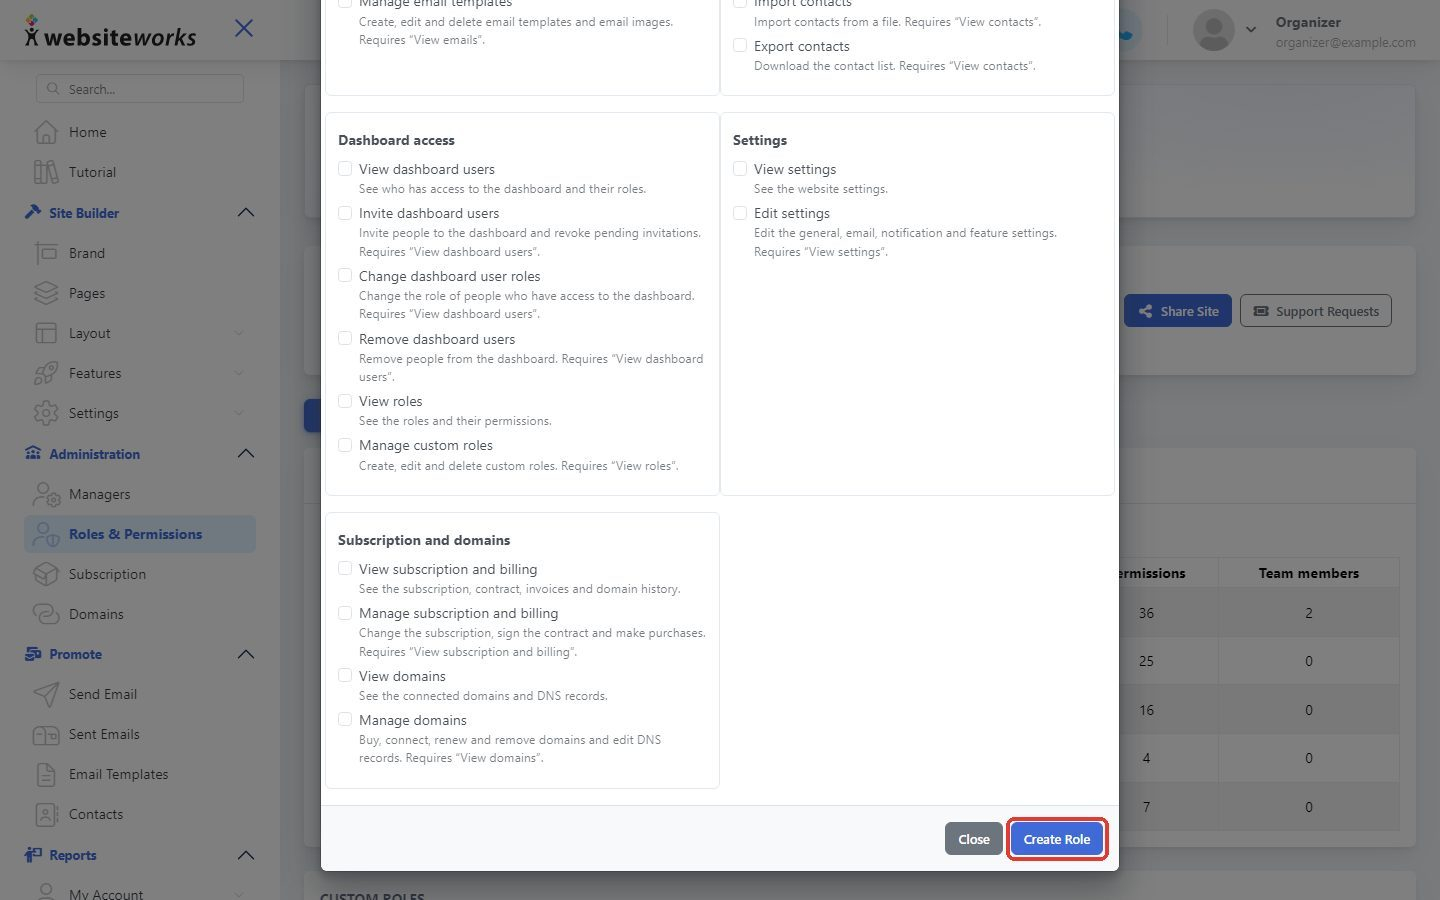
Click Create Role. Your role now appears under Custom Roles, and you can pick it when you invite or change a manager. Use the buttons next to a custom role to View, Edit or Delete it.
Good to know: Changes to a role apply right away to every team member with this role. If you delete a role that people are using, you'll be asked to choose a new role for them.